September 23, 2011

CHICKS AND CHOCOLATE FUN!

Happy Friday!!! YAY!! I love Friday - it means I get to see more of my husband, lol! Not so much with the teenagers, they always seem to have a PACKED schedule and this weekend is no exception, lol! Although I don't get to spend much time with any of them this weekend as my son and my husband are playing in a golf tournament that starts tonight and ends Sunday night...but, I am glad they have that time together :-) As for my daughter, between football games, sleepovers, and festivals, she is gone all weekend, lol!  I don't have any classes or anything scheduled this weekend, so I am looking forward to a little "me" time! However, my week was full of fun events, which is why the lack of posting this week, heehee! Last night was my Chicks and Chocolate class so I thought it would be fun to share a few of the projects we did! We made a total of four projects all involving chocolate - always fun, right??!! Combining stamping and chocolate is one of my absolute favorite things to do :-) The first one was a really big hit with all the ladies - they kept playing with them, lol! It is a Halloween slider card made with a standard sized Hershey bar!!!! It was hard to get a good picture of this for some reason so I apologize for that BUT you can still get the gist of this project :-) The base of this cute little holder is Basic Black card stock, and we used a few different Halloween sets for the stamping! The bats and the spider web are from the Wicked Cool stamp set and is one of my faves because it has such fun, cute images like these!  The spider web is stamped in Basic Gray ink and the bats are in Stazon ink. We used Naturals White card stock to stamp on, and sponged the edges with Peach Parfait classic ink. The spider is from a set called Batty For You, and it is one I used every year when Halloween comes around! We actually stamped this image twice - once in Stazon, which we then punched out, and once in Cherry Cobbler where we punched out just the spider and popped it up on dimensionals over the other one so that the words still show! Doesn't it look cute hanging in that web, LOL??!! Both the Naturals White and the Peach Parfait card stock layers are border punched using the Scalloped Trim border punch.  Before adhering the White layer, we wrapped a piece of Black Extra Wide striped Grosgrain ribbon around it, and tied it in a knot - or, I like to call it the faux bow, heehe! Once that was done, we adhered the whole piece to the front of the slider pocket.
There is an inside pocket as well that I would like to show you - it was super hard to get a good pic of because when the slider piece is extended, it is REALLY quite long, LOL! Here again though, you can get the idea!  How this works is as you pull the Hershey bar from the pocket at the top, the slider sentiment slides out from the bottom! The slider sentiments piece is made up of the same Peach Parfait and Naturals White card stock combination, and the sentiment is from the Grateful Greetings stamp set - super cute sayings in this set, so fun and very versatile! This is such a fun project to make, and you can do this with all kinds of things, it does not have to be a chocolate bar (although I like the chocolate bars, lol!) You could add licorice, a gift card, or any type of gift that would fit and lay flat inside!! I definitely think this project was the hit of the evening, although there was a lot of squealing going on through each and every one we created, so I am thinking they probably liked them all *wink* I enjoy this class so much - always a fun one to teach, and the ladies always have a wonderful time eating chocolate, stamping, laughing, and just having fun!! I will be holding another Chicks and Chocolate class for Christmas treats so watch the calendar and come on over if YOU like chocolate and stamping!! If you like the products you see here in THIS post, you can order them in my online store OR you can contact me and I will be happy to place your order for you!!! Now, I am off to do some fun stamping (meaning just for me, heehee) and then to pick up my daughter and drop her at a friends house! Have a wonderful weekend, and I will be back tomorrow with another fun Halloween project we did in class! I hope you take time to create something!!!
Slider Recipe:
Paper - Basic Black, Peach Parfait, Naturals White card stock
Inks - Black Stazon, Basic Gray, Cherry Cobbler classic inks
Stamps - Batty for You, Wicked Cool, Grateful Greetings
Tools - Scalloped Trim border punch, 1 1/4 inch and 1 inch circle punches, red sticky tape, dimensionals
Accessories - Basic Black wide striped grosgrain ribbon, Hershey chocolate bar

September 20, 2011

HOLIDAY MINI SPOTLIGHT - DAY TEN

Good morning!!! Today is the last day of my Holiday Mini Spotlight Series!! I hope you have enjoyed the last ten days of posts showcasing the fabulous products the mini has to offer!! I am sure you will see more projects from me using mini products, but I have a lot of other projects brewin' right now too *wink* Today I am going to share a Christmas card that uses several different products from the mini! The image is from the Christmas Lodge stamp set - the images in this set are just beautiful!!! I stamped the image in Always Artichoke CRAFT ink, then added clear embossing powder and embossed it using my heat tool.  I then added some subtle white accents on the edges and the bottom of the tree using my white gel pen!

Here is a closeup so that you can see a little bit better although I know it is hard to see in the picture.  I stamped it on Naturals White card stock because I love the pigmentation of this paper, it looks fabulous with this stamp set! I used the Scalloped Oval Die Cut with my Big Shot to cut the oval and the Scalloped frame around the image. It fits perfectly inside there like it was made for it :-) The patterned paper is from the Frostwood Lodge Designer Series paper pack, also in the Holiday Mini and it has beautiful vintage pages that are perfect for all you holiday projects! I just love the woodgrain look of this paper - perfect for the tree, right?? The sentiment is also from the Christmas Lodge stamp set and is stamped in White CRAFT ink, then embossed using the white embossing powder because I really wanted it to stand out! I used my mat pack to add the textured border along the top and the bottom, and then I trimmed each end of the sentiment piece using the Designer Label punch! It is so fun to be able to use punches in lots of different ways, and I really love the design it leaves here on the edges! I then popped the whole sentiment piece up on dimensionals.  The ribbon is also from the mini and is Early Espresso Quilted ribbon - totally yummy ribbon!! It looks and feels rich!! Soooo pretty!! Lastly, I added some pearls to each scallop around the image - doesn't it look awesome??!! I love these pearls, they dress up every projects I used them for! This is a simple card, but very pretty, and would make a great Christmas card (hmmmm.....maybe I will use this one, lol!) If you like any of these products and would like them for your own, you can shop in my online store, or contact me and I will be happy to place your order for you! I had such a great time showing you all these wonderful projects using mini products - I hope you were inspired by at least one project that I shared!!Now, I am off to get ready for my downline meeting tonight - I just love seeing my gals, they are all so creative, sweet, and fun!! I hope you all have a fabulous day, and take time to create something!
Card Recipe:
Paper - Chery Cobbler, Early Espresso, Naturals White, Always Artichoke card stock, Frostwood Lodge Designer Series Paper
Inks - Always Artichoke and Whisper White CRAFT inks, Early Espresso classic ink, white gel pen
Stamps - Christmas Lodge
Tools - Big Shot, Scalloped Oval die, heat gun, clear and white embossing powder, Designer Label punch, Dimensionals
Accessories - Early Espresso Quilted ribbon, Basic Pearls

September 19, 2011

HOLIDAY MINI SPOTLIGHT SERIES - DAY NINE (SCROLL DOWN FOR PICS)

Good Monday morning ladies!!! I hope you all had a great weekend!! I have to tell you, mine was FABULOUS!! Yes, I took time off from blogging - I wanted to spend some time with my daughter this weekend!! Friday night was the Homecoming game and she had a blast! She was on the Homecoming Committee and worked very hard on the Freshman Float for the halftime show.  Well, for the first time in SIX YEARS, the Freshman Float TOOK FIRST PLACE!!!!  She was soooo excited - I was thrilled for her AND them!! She had two friends who stayed the whole weekend with us as their moms were at a Church Retreat so we did lots of fun things together! Movies, pizza, frozen yogurt, mall shopping, lunch out, ,etc. It was a great weekend! Tony was hunting and Tyler had to work, so it was just us girls :-)
Here are a couple of the pics from this weekend - these silly girls were snapping pics of themselves all weekend! They were laughing hysterically as they took these but they actually got some cute shots and just look a those smiles!! They tend to look in the mirror a lot and take pics of each other - I don't remember ever doing this, but I am glad they do because it lets me see what they are up too, and I then I have some silly shots of her and her friends to put in her Freshman scrapbook - and yes, I plan on putting them ALL in there so she can look back and remember how much fun she had, and who she spent the most time with! I think these girls will be friends forever :-)
And, of course, here is the most beautiful girl in the world - and yes, I am biased because she is mine!!! I think she has a beautiful smile - it warms my heart to see it!!! She did tell me that she is "adorable" LOL! And yes, she is *wink* It was really nice to spend time with these girls, and listen to them tease each other, sing at the of their lungs, and laugh over everything and anything that happened! It made me happy that they included me as well, even though I know THAT won't happen very often so I better take advantage of it while I can, heeheee! It was just the BEST weekend - spending precious time with my daughter before she is all grown up and on her own is very important to me!!
So, if you have stuck with me this far, I will now share a project with you - I know that is why you stopped by, lol! This is yet another project I did using products from the Holiday Mini! It is a mini book class that I taught on Friday night while the girls were at the game - it gave me some girl time too :-) I used the Spice Cake Suite again - I know, I know! It IS a fall book though, so it worked out perfectly, heehee! I have already shared the cover in this post, so now I am going to share the inside pages! This is an accordion style book that folds up nicely for storage, but makes a beautiful display piece as well! I am going to show you all six pages plus the inserts, and then I will briefly tell you what products I used. I can't list everything for each page because it will be a book, and not a blog post, lol! Here are the pages listed in order:
These are the first two pages of the mini! Lots of detail on these pages - the leaves are cut out on the Big Shot using the Leaves #2 die, and then lightly sponged with More Mustard and Cajun Craze classic inks. The images are from the Always Thankful and Gently Falling stamp sets, both of which can be found in the Holiday Mini. The Spice Cake Designer Series paper is used throughout this mini, and you can see some of it here! If you noticed the More Mustard Scalloped polka ribbon loops sticking out of the top of the book, those are actually attached to the four insert pages that are included in this mini book.  Four fun pockets for more pictures, journaling, or memorabilia, - fun, right?!
These are pages three and four of the mini book and these pages each have a pocket for insert pages as well! The images on the left side of the book are from the Faith in Nature Hostess set - this is a beautiful stamp set that goes well with lots of different projects! The punched flower on that page was made using the Blossom Bouquet Triple Layer punch, love it!! That yummy ribbon along the bottom of that page is the Pool Party Ruffled ribbon, which I love!! The image and the sentiment on the right side of the book are from the Always Thankful stamp set: there are such great images in this set I think they are ALL used in this mini, lol! The sentiment is punched out using the Decorative Label punch and then popped up on 
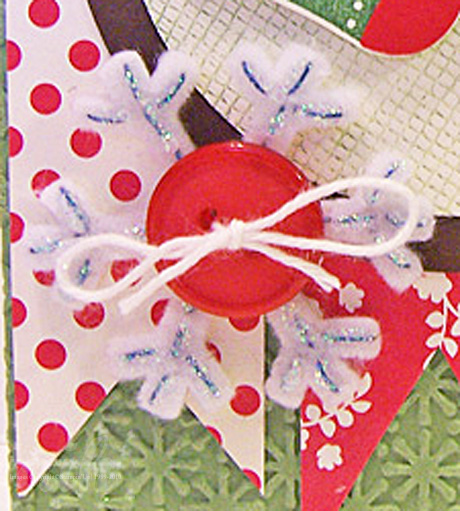
dimensionals. See that button? That is also from the Holiday Mini - there are four colors of these jumbo buttons in the Spice Cake Designer Buttons pack and you get four of each color!! I took some Spice Cake fabric and threaded it through the button, then tied a bow - I just love how the fabric frays and looks soooo good with these fall pages! The Early Espresso Wide Striped grosgrain ribbon is laid across the center of the page, and looks great with the colors of the paper!
These are pages five and six of the mini book, and the left had side has the last of the four pockets that contain an insert page. The pear image you see on that page is also from the Faith in Nature Hostess set. It is stamped twice, once directly on the page, and then again on some Naturals Ivory card stock.  The pear is cut out, then popped up on dimensionals over the stamped image on the page - looks great! The border along the triangle piece of the Spice Cake DSP is actually from the Lace Border punch - we just punched it out, then cut the lace border in half and snailed it to the triangle! The accordion flower was also made out of the Spice Cake patterned paper, and we added some Soft Suede taffeta ribbon, and a More Mustard flower designer button. On the right side there are images from both the Always Thankful and the Gently falling stamp sets. The ribbon down the edge is Very Vanilla thin grosgrain ribbon, and the border along the triangle of Pool Party card stock is punched using the Eyelet Border punch.
These are the inserts that are located in the four pockets of the mini - I only took a picture of two of them as the other two are identical to these. These were kept simple as too much embellishing here would have made it difficult to close the book and you want it to be able to lay flat if need be. The top corners are rounded using the Corner Rounder punch, and each insert has a piece of looped More Mustard Scalloped Polka Dot ribbon held in place with a Chocolate Chip jumbo brad. There is lots of room to add extra pics, or notes, or whatever you want!! So, that is the book - isn't it fun??!! This book IS available in a kit so if you would like to make one of your own, please contact me and I will mail it out priority flat rate straight to you! Cost of this is $45(plus 4.95 shipping) and you receive everything you need including directions for putting it together! If you want to purchase the items you see here, you can place an order in my online store, or contact me and I will be happy to place your order for you! I hope you enjoyed this super long blog post - if you hung with me to the end, you are a ROCK STAR, lol!!! I will be back with a cute Christmas project using Holiday Mini products for my last product Spotlight post! Have a wonderful day, and I hope you take the time to create something!

September 16, 2011

HOLIDAY MINI SPOTLIGHT SERIES - DAY EIGHT

Happy Friday!!! At least I hope it is :-) I actually have been sick and had a horrible headache yesterday, so it was all I could do to take care of the absolute priorities yesterday so sorry I missed ya here!! BUT, I do have a card to share today that uses the fabulous Holiday Mini fall product line :-) This was actually another workshop card that I did this week - I love the Gently Falling stamp set, these leaves are just sooooo pretty! I have to say, it was a VERY big hit at the workshop too :-) Everyone seems to love fall, and we are definitely ready for it here after all this 100 degree weather!!!! This card screams fall with all the colors and pretty leaves falling down :-) The base of the card is Pool Party card stock and I have to say, I would have never thought to use this color for fall, but it works soooo well, and I am hooked on it! It's a very versatile color, and definitely my favorite (this week anyway, heehee!).  The outline of the leaves are stamped on Naturals Ivory card stock in Soft Suede classic ink, and then stamped again using the full leaves in Pool Party and then More Mustard ink to give that pretty fall coloring.  I love two-step stamping and I think that is why this stamp set appeals to me so much! You can do sooo many different things with it!! The patterned paper along the bottom is from the Spice Cake Designer Series paper pack, and is punched using the Eyelet Border punch. I lined it up on the bottom edge to give it the look of double bordering  with the edge of the Pool Party card stock. So cool!! Then, I layered a piece of More Mustard Scalloped Polka Dot ribbon right over the top! The sentiment is actually from another Holiday Mini set called Always Thankful, another fabulous fall set that makes me happy! I stamped it in Soft Suede on Naturals Ivory, then punched it out using the Modern Label punch.  Lastly, I layered the sentiment over a piece of River Rock card stock that is punched out using the Designer Label punch, then popped the whole thing up on dimensionals. And of course, no card is complete without a little bling so I added two small rhinestones to my sentiment to make the whole card pop!! This card makes me happy - the colors are a great mix and have quickly become a favorite for me! If you are in love with these products and want to have them for your very own (and you know you do *wink*) you can order them in my online store or contact me and I will be happy to place your order for you! So, today I am finishing prepping for my mini book class tonight, which I will share with you all tomorrow! Tomorrow I have Scrap Club as well, so a busy couple of days here :-) I hope you all have a fabulous weekend!!!!
Card Recipe:
Paper - Pool Party, Soft Suede, River Rock, Naturals Ivory card stock, Spice Cake Designer Series Paper
Inks - Soft Suede, Pool Party, More Mustard classic inks
Stamps - Gently Falling, Always Thankful
Tools - Eyelet Border Punch, Designer Label Punch, Modern Label Punch
Accessories - More Mustard Scalloped Polka Dot ribbon, Basic Rhinestones

September 14, 2011

HOLIDAY MINI SPOTLIGHT SERIES - DAY SEVEN

Hi everyone!! I can't believe I am up to day seven already - I am having a ball playing with all these fun new projects from the Holiday Mini :-) I have been stamping away in my craft room as I have several events coming up, starting with a workshop tonight! I am excited to see this group - I know some of them, and they are so fun to stamp with! And, I am excited to meet some new stampin' friends - that is RIGHT up my alley, lol!!!  I wanted to share a quick card I made today with the Out On A Limb stamp set from the mini - super cute and fun! I am not a huge Halloween fan (I know, I know) BUT this set is really cute and the images appeal to me. So, let me tell you what I did!! The base of this card is Cajun Craze card stock, one of my absolute favorite colors so I love that I can use it for fall projects. I layered the base with a piece of Basic Black card stock that I embossed with my Big Shot using the Spider Web embossing folder.  I paired this with some of the fabulous Frightful Sight Designer Series Paper, which is found in the main catalog.  The images are so fun, aren't they?? I had to use those bats and spiders, so I decided they needed to "carpool" together, lol! The "moon" behind them is sponged in using a finger dauber - I got it by punching out a circle and then using the outline of that punched circle, I sponged all around it! Perfect circle every time :-) I also sponged in the grass using a mix of colors to show the fall season. The Sentiment and the bats are actually from a different stamp set called Wicked Cool, and it is found in the main catalog as well! The ribbon is Grey satin ribbon, and totally yummy! See, I told you this one was nice and simple, lol!! I love how it came out - it is a fun Halloween card and I know JUST who to send this one to :-)  If you like the products you see here, you can order them in my online store or you can contact me and I will be happy to place your order for you! Just think, you can have this adorable Out On a Limb stamp set in your hands and stamping in just a few days :-) Now I am off to prep for my workshop tonight, and work on my class stuff for tomorrow!! I just love my job :-) Have a wonderful day and I hope you take some time out to create!!
Card Recipe:
Paper - Cajun Craze, Basic Black, Whisper White card stock, Frightful Sight Designer Series paper
Inks - More Mustard, Cajun Craze, Old Olive, Peach Parfait classic inks
Stamps - Out on a Limb, Wicked Cool
Tools - Big Shot, Spider Web embossing folder, Scalloped Oval punch, Extra Large Oval punch, 1 3/4 inch Circle punch, Sponge Daubers, Sponge
Accessories - Gray Satin Ribbon

September 13, 2011

HOLIDAY MINI SPOTLIGHT SERIES - DAY SIX

Happy Tuesday!!! Well, I hope it will be anyway, lol!!! I got up this morning in a kind of funk - I am missing my oldest son!! I know it probably sounds silly, he has not lived at home for four years, BUT he has also lived across the country, and seeing him only twice a year doesn't seem quite fair! Hopefully I will get to see him at Christmas in between his training tracks.  Now that he is on Active Duty, we never know when we might see him *sigh* This getting older is not quite what it seems - I like having my kiddos at home :-) So, I am stamping today and listening to upbeat music, and making myself get out of the funk, lol!!!! Stamping REALLY makes me happy; I consider it my therapy - each box that comes in the mail is one of my sessions, lol!!! And, I have been having a LOT of sessions lately because I am IN LOVE with the Holiday Mini products and keep ordering more :-) Especially the Spice Cake Suite - YUMMY!!! So, I am sharing that AGAIN today - no worries, you get something different tomorrow, heeheee! However, I have been working on my Fall FoliageMore Mustard, Pool Party, Soft Suede, Mini Book Class for this Friday so I wanted to give you a sneak peek at that book - I can't show you the whole thing until after the class in deference to those who have paid to take it :-) It is a 6x6 Accordion Mini book, and sooo cute and full of fall goodness.  It is my favorite time of year so I have enjoyed stamping with all the new fall products! This picture is of the cover of the book!! I think is screams fall, don't you??!! I used the Spice Cake Designer Series paper to create the border around the outside.  I made this using the Scallop Square die on my Big Shot - this is the outside once the square is cut out! And, of course I used the leftover square elsewhere *wink*  The center square is Naturals Ivory.  I cut out the square, and then used my corner rounder on the edges, sponging it with Soft Suede classic ink.  The sentiment is from the Hostess Stamp Set Faith in Nature and can be found in the Main Catalog.  See that giant button??!! Isn't the biggest button you have seen for scrapbooking or cardmaking?? It is for me!! I love buttons of all shapes, sizes, colors - you name it! Soooo, when I saw these in the Holiday Mini, I just knew I had to have them! They are called Spice Cake buttons and you get 16 of these beauties in four different colors that all coordinate with the beautiful patterned paper - YUMMO!!! And, at $7.95, you CANNOT beat that bargain :-) I used the Pool Party button and laced it with some of the Spice cake fabric - Looooove it!!! I adhered the button to the cover over the French Foliage background words - this set is also super cute and can be found in the Main Catalog as well! Lastly, the leaves! I am really having fun with the Gently Falling stamp set from the mini - I have made lots of leaves in different fall colors - they never turn out the same! I stamped these on Naturals Ivory card stock, then used  and Cajun Craze, More Mustard, Soft Suede, and Pool Party  classic inks to make the beautiful color mix you see on these leaves.  Then, I just cut them out and adhered them to the cover using a mix of snail and dimensionals so the leaves look like they are scattered on the cover. As you can see, the book is held together using More Mustard scalloped Polka Dot ribbon - soooo pretty!! The pages inside this beautiful mini are full of mini goodness, and lots of our fall products from the main catalog as well! If you are interested in taking this class, please contact me ASAP as I still have a few seats available!! Not local, but want the kit?? The kit is available for $49 plus shipping, and all the cut work and stamping is done, you just assemble the book using the full color directions that will come with it!!!  This is a GREAT value as this mini book has over 10 pages!! For information on purchasing the kit, please contact me and I will send it to you!! And, if you want to order the products you see here, you can do so using my online store, or by contacting me as I will be happy to place your order for you!  So, I am spending the day getting ready for a workshop tomorrow - so excited to stamp with this group of ladies because I only know a few of them, and that means, more stamping friends, whoohooo!!! I will be back tomorrow with my next installment of the Spotlight Series featuring some uber cute projects! Until then, have a fabulous day and take some time to create!!!!
Mini Book Cover Recipe:
Paper - Soft Suede, Naturals Ivory card stock, Spice Cake Designer Series Paper
Inks - More Mustard, Soft Suede, Pool Party, Cajun Craze classic inks
Stamps - Gently Falling, French Foliage, Faith in Nature (hostess set)
Tools - Big Shot, Scallop Square Die, Corner Rounder
Accessories - Spice Cake buttons and fabric, More Mustard Scalloped Polka Dot ribbon

September 12, 2011

HOLIDAY MINI SPOTLIGHT SERIES - DAY FIVE

Good morning!!! Here it is, Monday again - the weekends seem to go by sooooo fast!! I had a very busy weekend so that does not help, lol! I took my daughter and her friend shopping for their Homecoming Dresses (her first one!!!!!!!!!!!!!!!) and that was really fun! They both got beautiful dresses, and they are sooooo excited - and so am I! I can't wait to take pictures of them all dressed up :-)  Then, yesterday I taught my Fun with Punches class, which was a blast! I don't teach this class very often, so I really enjoy it when I do! We had a great time!! This week will be VERY busy as well as I have two workshops, a mini book class, Scrap Club, and Stamp Club - WHEW!!! Lots of stamping going on around here :-) I have busily stamping holiday things already so when I walk outside and the heat hits me, I get startled back into reality, lol!!! One of those projects is the fifth in my Holiday Mini Spotlight series I want to share with you today! I stamped this project using the Stitched Stockings stamp set and the Holly Berry Bouquet Designer Series paper!! I love the bright, Christmasy (is that a word??!!) feel this patterned paper has, it makes me smile!!! I used three different patterns of the paper here and just cut them into long banners as my background.  The base of this card is Wild Wasabi card stock and I actually embossed the base front with my Big Shot using the new embossing folder from the Mini called Snow Burst - isn't it pretty??! I added a piece of card stock to the inside flap of the card to give it some stability since the embossing tends to change the texture of the paper a bit.  The circles were also cut on my Big Shot using my 3 and 31/2 inch Circle dies.  The smaller circle was stamped in Wild Wasabi using the Netting background stamp (found in the main catalog) which is definitely a favorite of mine. The stockings were stamped in Garden Green classic ink and then punched out using the fabulous new Stocking Builder punch in the mini!!! LOVE this punch - you can see the heel and toe are actually Real Red - I just punched those out too! So fun!!
And, check out the top of the stockings - that soft, beautiful ribbon you see there is another great new product called Very Vanilla Velvet stitched ribbon and it is totally YUMMY! It is really soft, thick, and will be soooo pretty on packages and, well, stockings, lol! I just cut a small piece off and snailed it to the top! It added dimension to the stockings, and then I popped them both up on dimensionals to give it just a little more *wink* The stocking with the snowflake in the middle is sporting a little rhinestone to give it just a little bit of bling :-)

See this pretty snowflake? It is also from the mini and is part of a super cute package of felt shapes called Stitched Felt - it comes with 4 different shapes, and 16 pieces in all for less than $10 - GREAT deal!! The snowflake has some blue stitching on it that I wanted to dull a little bit for this project, so I used the new Dazzling Details liquid glitter.  It really makes the snowflake stand out! I added a Real Red Designer button to the center, with Whisper White bakers twine threaded through it and tied in a bow! I think this snowflake is a wonderful little embellishment that not only dresses up cards, but would look fabulous on the top of a little gift box or bag! It's like getting two presents in one, lol! The last thing on this card is the sentiment and it is part of the Petite Pairs Stamp set found in the main catalog - I love this stamp set, and find myself using it over and over again because it has such wonderful sentiments in it! I stamped it in Garden Green classic ink, punched it out using the Large Oval Punch, then layered it on the Extra Lunch Oval punched out of Real Red card stock.  Then, those two pieces are layered on a piece of Early Espresso card stock punched out with the Curly Label punch.  The whole thing is popped up on dimensionals and then I could not help myself, I had to add some rhinestones, lol!! I had a great time making this card, and I used a TON of new product from the Holiday Mini! If YOU love these and want to have them for your very own (and you KNOW you do, lol) you can order them in my online store OR contact me and I will be happy to place your order for you!  I will stamping the day away getting ready for all my fun events coming up this week, so lots of fun for me!! I will be back tomorrow with the sixth in my Holiday Mini Spotlight Series - I hope you are enjoying them as much as I am enjoying sharing them :-) See you tomorrow!!
Card Recipe:
Paper - Wild Wasabi, Real Red, Early Espresso, Very Vanilla card stock, Holly Berry Bouquet designer series paper
Inks - Garden Green, Wild Wasabi classic inks
Stamps - Stitched Stockings, Petite Pairs (main catty), Netting Background stamp(main catty)
Tools - Big Shot, Snow Burst embossing folder, 3 and 3 1/2 inch circle dies, Curly Label Punch, Large and Extra Large Oval punches, Stocking Builder Punch, dimensionals
Accessories - Whisper White bakers twine, designer buttons, Dazzling Details liquid glitter, Basic Rhinestones, Stitched Felt, Very Vanilla Velvet stitched ribbon