December 13, 2011

I LOVE CHRISTMAS!

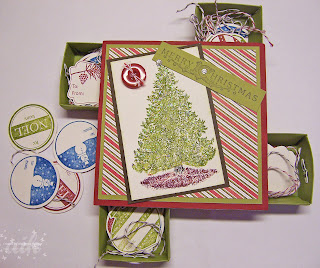
Good morning stampers!! I have to say, this is my favorite time of year - I just adore Christmas! All the fun decorations, the baking, the presents, the music, the family and friends, I love it ALL!! I especially love to create fun gifts and cards for all the special people in my life! I tend to make sooo much more than I ever could use, but boy, is it FUN!  And, we have such fabulous holiday items in our Holiday mini this year that well, I went a little crazy with it and had to have it all, lol!!! So, I thought I would share a fun little craft that we made during my Santa's workshop classes - it is a box filled with fun Christmas tags to use on all your special gifts! I actually saw this idea somewhere and tweaked it somewhat to make it my own and I love how it turned out!!! The box itself is made of chipboard and then covered in Cherry Cobbler card stock - we also did that with the drawers to this cutie will last for lots of seasons in the future! The top and bottom of the box are 6x6 in size, and then the drawers were cut using the Matchbox die for the Big Shot, lined up with the edges of the box, and sticky taped down. The top of the box has two more layers, one of Old Olive card stock and then another using the Letters to Santa Designer Series paper - looooove it!!! The image is also layered - the base layer is Early Espresso card stock and then the image is stamped on Naturals White card stock. This pretty tree comes from the Christmas Lodge stamp set, available in the Holiday Mini (but only until the 3rd of January so you better get is soon!). I love this tree because it is a nice, big image which makes a great focal point! We used the Old Olive, Early Espresso, and Cherry Cobbler stampin' write markers to color in the tree and then stamped it, making a beautiful watercolor effect that gives this box a wonderful vintage look!
Then, we added some Dazzling Details to make the tree look like it had hundreds of pretty lights on it - check out the close-up here! Doesn't it look fabulous, all sparkly and twinkly??!! I swear, this made the whole box for my stampin' ladies -they just loved it!! We added a pretty Cherry Cobbler button from the Regals designer buttons group, which we threaded with Cherry Cobbler twine. We tied a knot and then distressed the ends to add to that vintage look. The sentiment is also from the Christmas Lodge stamp set, and it is stamped in Early Espresso on some Old Olive card stock, then adhered to the box. And, of course we needed to have a little more bling so we added a rhinestone to the top of the tree and to the sentiment to give it that extra WOW! factor. Now, for the drawers! There are four drawers on this box, one on each side. As you can see from the picture, they can slide in and out, and they are easy to open since each one has a large brad that acts as the drawer pull. Each drawer can hold up to 20 tags and pieces of twine, but we did eight for each drawer, all in different shapes, colors, and styles so there is something for every present that gets wrapped and put under the tree! I am not going to name each and every stamp set we used to make the tags, but if you have a question about any of them, feel free to email me and I am happy to answer you! We had a blast making this Christmas box, and I am sure it will be put to good use over the next few weeks *wink* I know I have used all the tags and made some more :-) If you like any of these products and want some for your very own, you can order them in my online store or contact me and I will be happy to help you place your order! Now, I am off to bake a birthday cake for my sweetheart who turns 44 today - yep, he has finally caught up with me, lol!!! For ten months I am older than him, a fact he never lets me live down :-) I hope you all have a fabulous day and take some time out to be creative!!!
Box Recipe:
Paper - Cherry Cobbler, Old Olive, Early Espresso, Naturals White card stock, Letters to Santa Designer Series Paper
Inks - Old Olive, Cherry Cobbler, Early Espresso, Marina Mist stampin' write markers and classic stampin' pads
Stamps - (image and sentiment) Christmas Lodge
Tools - Matchbox die, Big Shot, Ornament Punch, Designer Label Punch
Accessories - Regals Buttons, Dazzling Details, Cherry Cobbler twine, Basic Rhinestones
 

December 12, 2011

MAD BUSY BUT STILL CREATING :-)

Good morning stampers! I have been a bad blogger lately, but I cannot seem to find enough hours in the day to get everything done that I need to do!! I have been teaching a lot of holiday classes lately as well as finishing up some of my own Christmas projects so there is a lot of creating going on! I thought I would share another fun project with you today that we made in my Santa's workshop a couple of weeks back.  This is a jar that is filled with all the ingredients you need to make a wonderful mint hot chocolate, something we have each and every year, and that we all look forward to as the weather gets colder! We used some of the holiday fabric called Candy Cane Christmas - the patterns are so fun and festive, they make me smile! We cut a piece out using the Scallop Circle Bigz Die on the Big Shot - it fits perfectly for these little pint jars! We placed it over the inside ring of the lid, pulled it tight, and then screwed the lid back on - super cute, right??!! We then added a punched flower created from the Scallop Circle punch and the 1 3/8 inch Circle punch with a Holly Berry Bouquet Real Red button. To Top it off, we threaded some Whisper White twine through the button and tied a cute little bow - simple but oh so cute!! We then wrapped the lid with some of Baha Breeze Seam Binding ribbon that is attached using Red Sticky Tape - have I told you how much I love this stuff??!! My customers and friends tease me about my obsession with this tape but it is a wonderful adhesive and I keep myself well stocked with it, lol!! The tag is made using the Two Tags die on the Big Shot and Real Red card stock. The sentiment is layered with Baha Breeze card stock punched out with the Designer Label punch and then the sentiment itself is from the Sweet Season stamp set, which has some super cute stamps that are perfect for gift giving. We stamped it in Real Red classic ink on Naturals White card stock, then punched it out with the Wide Oval punch. It is attached to the jar with some twine that is threaded through the ribbon and then tied in a knot, then trimmed close to the knot so it does not show too much. The inside of the tag has the typed out recipe and directions on how to make this yummy chocolatey treat! This little gift item was a huge hit at the workshop - but nobody wants to give them away, lol! They ARE darling, and look great on the kitchen counter :-)  I hope you like this little treat, and find some time to make some of your own handmade gifts this year - they are always the most well received! Who wouldn't want to receive something as totally cuts as this?? *wink* I will be making several more handmade gifts this week as I get things ready for my husband's staff and our friends. If you like the items that were used on this project, you can purchase them in my online store or contact me and I will be happy to take your order! Now, I am off to get my many errands done so I can come home and play in my stamp room - yippee!!! Have a wonderful day and check back tomorrow for another gift idea that you are going to love!!
Jar Recipe:
Paper - Real Red, Baha Breeze, Naturals White card stock
Inks - Real Red classic ink
Stamps - Sweet Season
Tools - Big Shot, Scallop Circle Bigz Die, Two Tags Die, Wide Oval punch, Designer Label punch, Red Sticky Tape, Scallop Circle punch, 1 3/8 inch Circle punch
Accessories - Holly Berry Bouquet buttons, Baha Breeze seam binding ribbon, Whisper White twine, Candy Cane Christmas fabric

December 6, 2011

HO HO HO WALL DECOR

Good morning Stampers!!! WOW!! Another VERY busy week and weekend as I had five events that I had to prep and teach! It was a whole lot of fun though!!! One of my really big events for the holiday season was this past Saturday when I held my annual Santa's Workshop where we did four great holiday gifts!! We had a BLAST!!! The ladies loved the projects, which of course made ME happy, and I was thrilled to see them enjoying the day! Lots of laughing, holiday snacks, and delicious hot cider! I have the BEST friends - thanks to my good friend Shelly who owns a local nursery in the area, we had a wonderful space to hold our class - it was soooo much fun!!! I want to share the projects with you this week starting with the HO HO HO wall hanging we made! This is sooo super cute and I have mine already hung up with the rest of my Christmas decorations, lol! It was hard to get a good picture of the whole thing so I did the best I could - I will share with you each square separately so you can see how we put this together! We used lots of fun and festive holiday products so everyone got to play and explore fun options! The three squares are made of chipboard and then covered with Letters to Santa Designer series paper, both of which were cut on the Big Shot using the Scallop Square die. We attached all three squares to some Cherry Cobbler wide grosgrain ribbon, making a looped handle at the top, which is secured with an antique brad with a pretty snowflake on top. The snowflake was made using our fabulous silver glitter paper and the Snowflake punch (I will say that punching out the silver glimmer paper with a punch was a challenge - you need to do it slowly and definitely one at a time, but totally worth it as you can see!)
Here is the first square! Sorry for the pic being a bit blurry - I don't know what is wrong with my picture taking abilities lately :-(  Each one of the squares has a solid Old Olive square that is cut out using the Square Die for the Big Shot, rounding the corners with the Corner Rounder punch. We then stamped on this square in Cherry Cobbler ink with the fun stamp set called Merry and Type. Such a cute stamp set, love it! The letters were cut out using the Serif Essentials large letter dies for the Big Shot, using both Chipboard and the Silver Glitter paper. It gives the whole hanging a wonderful dimensional look without adding a ton of bulk to it. I did not want it to be too heavy as it does need to hang up and then fold away nicely to be used again and again! That pretty felt wreath is from our Felt Flurries pack that can be found in the Holiday mini - you get a lot of bang for your buck with this package since you get sooo many of each fun little holiday embellishment!
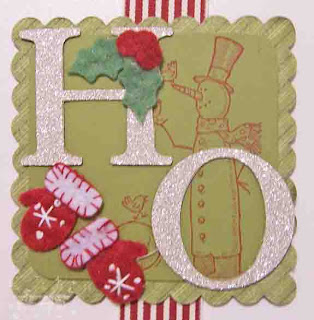
This is the second square on the hanging, which as the same solid square as the first one, along with the same letters for the sentiment! The stamp set that we used on this one is called Snow Much Fun and I have to say I thoroughly enjoy stamping with this fun set - the two snowman images totally make me smile! There is a short, fat snowman in this set as well, and the sentiments are just as cute as can be! For this square, we used the tall snowman and his birdie friends as well as the little snowball with the birdie on it - aren't they adorable?? They are both stamped in Cherry Cobbler ink as well. The holly leaves and the sweet little mittens are more of the cute felt flurries embellishments from the package - those mittens are just sooooo stinkin' cute! They actually come attached with a piece of string between them, just like we all had when we were little, lol! We just cut them off for this project, but they look just as cute strung together!
This is the third and final square on the hanging, again with the same solid square and the pretty lettering. The stamp is from the Merry and Type stamp set and is actually a pretty large stamp - we could not even get the whole stamp on here, cutting off some of the strings hanging down with the ornaments! I love this stamp, I think it is bold and really catches the eye! It is also stamped in Cherry Cobbler ink. We used even more of the felt flurries embellishments, adding in the really fun snowflake this time - I just love these!!! This was such a fun project to put together, and many of the ladies who attended told me this was their favorite of the four that we did! I have to say, I had a ton of fun designing this one too :-) If you would like to order any of the products you see here, you can order them in my online store or you can contact me directly, and I would be happy to place your order for you! Or, if you would like to book a workshop and make your very own fun projects with your friends, contact me and let's get you all set up! Now I am off to finish prepping for my fun workshop later on this afternoon - I hope all of you can find time to stamp in this busy time of year, I believe it is so good for the soul, and much cheaper than paying for therapy, lol!! Have a wonderful day, and I will be back tomorrow to share some super cute tree ornament gift card holders!
Wall Hanging Recipe:
Paper - Old Olive card stock, Letters to Santa Designer Series paper, Silver Glitter paper
Inks - Cherry Cobbler classic ink
Stamps - Merry and Type, Snow Much Fun
Tools - Big Shot, Serif Essentials Large Letter Dies, Scallop Square Die, Square Die, Sticky Tape
Accessories - Cherry Cobbler wide grosgrain ribbon, Felt Flurries embellishments

November 30, 2011

TIME FOR THE CHRISTMAS COUNTDOWN!

Happy Hump Day stampers!!! Yes, I know it has been awhile, but I had some personal family health issues to focus on as my family is always my priority! Although we still are dealing with what lies ahead, and know it is going to be a VERY long and bumpy road, we are going to walk it together!!! So, I though it was time to get back into some semblance of a normal routine (do we EVER have that??) and share something crafty!! I want to share with you the Christmas Advent Wreath I made and then turned into a class - I did three sessions and each session was really fun!! And, we all left with a great decoration too!  I did all the cutting and the sticky tape ahead of time so they could put it together and decorate it - the fun parts, lol! We started out with a flat wooden circle that I ordered from an online supply store as I wanted the wreath to have a really sturdy base. We wrapped that in Cherry Cobbler wide striped ribbon, leaving enough to make the hanger you see in the picture. So, from the back side, you don't see ugly wood, you see pretty ribbon :-) We then cut out a circle that fit the back side of wreath - we used the cardboard from the paper packs since you can't see it. Then, we covered that with the Cherry Cobbler card stock circle you see in the center - both are attached using hot glue since we never want it to come off, lol!!  The 24 boxes you see are made with the matchbox die for the Big Shot and the base is made of Cherry Cobbler card stock to ensure they are nice and sturdy for many years to come! The lids are made of patterned paper from the Letters to Santa Designer Series paper pack - such beautiful paper!! The bottom twelve boxes are sticky taped to the circle first, creating the base for the top ones. They are placed out diagonally around the circle in order to keep the circle shape since as you go around the circle, the angles change quite a bit - this was tricky, but everyone got it :-) The top boxes then were staggered in between every two of the top boxes, creating that awesome wreath look! Each of the top boxes have an Old Olive Ornament that was punched out with the Ornament punch and adhered to the box. The numbers on the box were cut out using the Medium Sizzlets alphabet for the Big Shot, and were cut using the Silver Glimmer Paper - looks amazing, all sparkly!!! Then, the ornaments were each adorned with tiny bows using some of the yummy Cherry Cobbler Quilted ribbon.  The numbers for the bottom boxes are on the inside of the wreath and correspond with each box, making sure 13 started to the right of box 12, keeping the sequence going. In the very center of the wreath, there is a Scalloped Circle of the Letters to Santa DSP that was cut on the Big Shot. A Whisper White circle was also die cut and nested in the center after it was stamped using the Christmas Postcard A la Carte stamp. It was stamped in Stazon, then colored in with Stampin' Write markers. For some fun accents, we added a snowflake and some of the holly leaves out of the super cute Stitched Felt package you can find in the Holiday Mini, along with the Holly Berry Bunch button we used in the center of the snowflake! To finish it off, we put Rhinestones on every other scallop, and added some Dazzling Details to the stamped image, making the whole project sparkle!! Everyone loved how it turned out - including me!! I am thrilled with this wreath and can't wait to start using it tomorrow :-)
Here are some closer shots of the wreath as well as showing how the drawers open to put the treat inside!  I hope you enjoyed seeing this as much as I enjoyed designing it! I think made from the heart decor is the best kind, don't you?? I have made several home decor items this year that I will share with you over the next few weeks as we count down the days until Santa comes!! Christmas is my very favorite time of year, and I am so very excited as my oldest son will be coming home for the holidays as he transfers to Southern California for his first Marine Corps duty station. Yes, my baby is all grown up!! I still can't wait to hug his neck though, lol!!! I will be back tomorrow with some other super fun and cute projects to share, but until then, take some time to be creative, it makes for a better day!!  Have a wonderful Wednesday!
Wreath Recipe:
Paper -  Cherry Cobbler, Old Olive, Whisper White cardstock, Letters to Santa Designer Series paper, Silver Glimmer Paper
Inks - Black Stazon, Cherry Cobbler, Old Olive, Marina Mist, River Rock Stampin' Write markers
Stamps - Christmas Postcard
Tools - Medium Sizzlets Alphabet, Scalloped Circle die, Clear Circle die, Matchbox die, Big Shot,  Ornament Punch, Sticky Tape, hot glue gun
Accessories - Basic Rhinestones, Cherry Cobbler Wide Striped Ribbon and Quilted Ribbon, Stitched Felt, Hollyberry buttons, Dazzling Details


November 21, 2011

FAMILY EMERGENCIES MAKE FOR NO BLOG TIME

Hello my stamping friends!! I realize it has been three long weeks since I have blogged, but our family has been double and triple whammied with some serious medical and personal tragedies that have had all my focus and energies. It is always hard to know that someone is hurting, but when they are your family, it makes it even harder. I hope that all of you will keep us in your prayers and thoughts because we will need them!!! We have quite the road ahead of us. Out of respect for my family members, I don't want to go into too much detail, just know we are working through all of this at a very difficult time. Thanks for sticking by me - I hope to share something fun tomorrow as I have several things I have not had time to share with you that I would like to over the next few days!

November 1, 2011

HOSTESS APPRECIATION PARTY - FUN!!!

Happy Tuesday stampin' friends!!! WHEW! It was a hugely busy weekend since I had my Hostess Appreciation Event on Saturday!! It was a lot of work, but it was really worth it because I think everyone had a good time!! I wanted to share the make n' takes with you today as well as some pics of the decorations and such! So, grab a cup of coffee, and enjoy!! This first card is one of two make 'n takes that we did! The theme throughout the whole event was the Big Top Suite using all the fun papers in that collection and the Sweets for the Sweet stamp set as well as the Up, Up, and Away stamp set.  This one features the former and is just too too fun!  Sorry for the bad pic - not sure what is going on there, but my camera has been acting wonky lately!! The background of the card is embossed using the Polka Dots embossing folder, and I just love how it looks with those bold, bright colors! The pinwheels are stamped twice - once on the card, and then once on another piece of card stock, then cut out and popped up on dimensionals.  The two candy pieces are also up on dimensionals and all four items have the liquid diamonds on them so they are nice and glittery IRL!
This second card is a gate fold card, again using the Big Top Suite, although the sentiment is from the Happy Greetings Stamp set.  The small candy was stamped and punched out using the 1 inch circle punch, and the sentiment was stamped on Whisper White card stock, and then punched out with the 2 3/8 inch Scallop Circle punch, then layered on a 2 1/2 inch circle of Real Red card stock.  We added some rhinestones underneath the sentiment and again added some Liquid Diamonds to the candy piece so there is lots of glittery fun on the front of this card!


The inside of this card is really fun, with the balloons from the Up, Up, and Away stamp set floating away into the clouds!  I was not sure I was
 going to use this stamp set much, but I find myself using it for lots of different occasions, it really is very versatile and definitely fun to play with, lol! It's a great card that can be used for all kinds of occasions, so I made a couple for my card stash - you never know when you are going to need that quick card, right?? *wink*  These next pictures are just some of the fun decorations I made to spruce up the room we were using since it was at the back of the local pizzeria and has tons of sports decor - nice, but not really what I was going for, lol! I kept true to the theme, using the Big Top Suite! I am not going to address each and every decoration so if you have any questions about anything, you can just email me and I will be happy to answer them :-)
This was the food and drink table - it didn't look so empty once the pizzas were brought in, lol! I made a cute banner that says thank you, and then each water bottle had some flavor of Crystal Light to add. I also made some fun cupcakes because I think every party should have cupcakes, don't you??  Here are some better shots of each of these items so you have a better idea of the decorations and how they were put together! I tried to make it personal and fun since these special ladies hostessed for me all last year
and introduced me to lots of local ladies who have since become my friends and fellow stampers!!! Which is why I totally love my job - I get to meet wonderful people like these ladies!! Out of the 27 ladies I invited, 15 of them came, so I was thrilled to see them! I wish they all could have been there, but that just does not seem to happen with everyone's busy schedules these days!! They all know how much I appreciate them though - I make sure of it!! Aren't the little pennants cute on the cupcakes? I had such fun making those!! And, the water bottle holders were perfect to keep the little Crystal Light packets in and they brightened up the room as well! Many of the ladies actually kept the holders so I know they enjoyed them as well. There were lots of different flavors to choose from but I discovered that I really like the Green Tea Raspberry something I never thought I would drink - who knew??  LOL - it's very rare I try something new *wink*  I also made each of them a little goodie bag full of different embellishments as well as some 3x3 cards and envies and their own sponges!! For some reason, these silly things are so popular with them that I thought it would be fun to give them each their own and the loved them - a couple of the ladies actually squealed - over a sponge - I know, right??!! In addition to the goodie bags, I also made them each a treat box filled with an assortment of Hershey's kisses - they even have cookies and cream now! Aren't they cute with those pinwheels?  I had the best time making those although by box 20 I was done, lol!
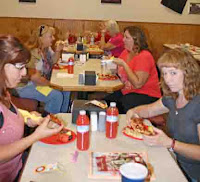
Here are some fun pics of the ladies eating, doing their make n' takes and playing some of the games - we had bingo, word search, stamping scavenger hunt, and stamping unscramble, and they all competed for prizes of current product! 
It was funny to watch them get all competitive in bingo, and then frustrated over the word unscramble - they had a hard time with Crop-a-Dile, lol!! There was a lot of laughter too though, and that made me smile - I really wanted them all to have a good time, after all, it was for them!!
Dawn was one of my very first hostesses after moving to Northren California and we have become great friends! Her group of friends actually formed a scrap club that lasted a year, and it was a really fun time! She is super talented and creative, and enjoys stamping! Here she is holding up her make 'n take - what a ham, lol! Katie is also a real sweetie, and I had the added pleasure of also having her mom Kim there as well - I love to stamp with these ladies, they are amazing! I adore them, as well as the regulars that stamp with them - I always leave a workshop with them feeling really good and happy because they are some of the nicest people I have ever had the pleasure to meet! Here is a pic of Katie with her new sister in law to be Barushka - I am sure I butchered the spelling of her name, but hey, I tried, lol!!! She is a sweetie, and just discovered the joys of stamping, and, judging from all the wedding favors they have been making, she is quite the natural!
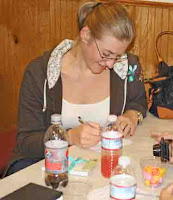
Katie is also quite the competitor, you can see here how hard she is concentrating at bingo, lol! She was one of the finalists in the three rounds, so she got to go home with some fun goodies!!  All in all, I thought it was a really fun day and I thoroughly enjoyed spoiling them because without them, my business would not be a business at all!! I hope to see many of them again this stamping year as hostesses and again next year at the Diva Event!!! I will leave the recipe for the cards so that you can know the products used, and again, if you have any questions, just let me know!!! If this looks fun to you, and you would like to come to my next Hostess Appreciation Event, contact me and let's get your workshop set up! I promise you it will be a lot of fun, and your friends will really enjoy the creating, the products, and ME :-) Plus, I would love to come and stamp with you - I am always up for a girls' night out *wink* Have a wonderful day and I will be back tomorrow (hopefully with clearer pics if I can figure out what is wrong with my camera) with another couple of fun projects I made this past week! Until then, take some time to be creative!!
Card One Recipe:
Paper - Real Red, Tempting Turquoise, Whisper White, Daffodil Delight card stock, Big Top Birthday designer series paper
Inks - Real Red, Daffodil Delight, Tempting Turquoise, Peach Parfait classic inks
Stamps - Sweets for the Sweet 
Tools - Big Shot, Polka Dots embossing folder, Modern Label punch, 1 inch circle punch, dimensionals, sponge
Accessories - Dazzling Details liquid
Card Two Recipe:
Paper - Daffodil Delight, Tempting Turquoise, Real Red, Whisper White card stock, Big Top Birthday designer series paper
Inks - Daffodil Delight, Tempting Turquoise, Peach Parfait, Bashful Blue, Real Red classic inks and stampin' write markers
Stamps - Sweets for the Sweet, Up, Up, and Away, Happy Greetings
Tools - 2 1/2 inch circle punch, 2 3/8 Scallop circle punch, 1 inch circle punch
Accessories - Basic Rhinestones, Dazzling Details liquid

October 28, 2011

A LITTLE BIT OF FALL

Happy Friday all!!! Man, this has been one busy week and I am not done yet, lol! Tomorrow is my big Hostess Appreciation Event so I am madly stamping fun goodies and creating goodies bags for all the special ladies who hosted a workshop for me last stamping year!!! I am so excited to see them all tomorrow - I am going to spoil them rotten, lol! I will share all the fun things I made on Monday, but today I am going to share another workshop card that really has fall written all over it! We used one of my favorite fall sets for this card called Day of Gratitude - it truly is beautiful! I just love the big Medallion, and all the fall leaves and acorns and such are wonderful accent stamps that make this set so versatile!  We paired this set with the yummy Spice Cake Designer Series paper and I think I can truly say that I have gotten my money's worth from this set, lol! It is such pretty paper, and the colors are fabulous!! I would NEVER have thought Pool Party was a fall color, but here it is as the base and accent color and it looks great!!! We stamped the base with the leaf stamp in Pool Party ink as well to add some texture. The patterned paper is punched using the Eyelet Border punch on both sides and then layered on some Soft Suede card stock. The main image is stamped in Soft Suede ink on Very Vanilla card stock, then softly sponged with More Mustard ink and mounted on More Mustard card stock.  And of course, we had to add a cute little button right in the center - I love those little flower buttons, they give just the right touch to almost every project! See that pretty ribbon? That is the fabulous Soft Suede taffeta ribbon - I love EVERY color of this ribbon, I swear it's the prettiest ribbon we have, I just love it!!! The sentiment is stamped in More Mustard, punched out with the Large Oval Punch, and then mounted on some Soft Suede card stock that is punched out with the Designer Label punch.  Then, the whole thing is popped up on dimensionals!! Isn't it a pretty card?  I love the colors, and the images - this card must makes me happy! We had tons of fun making this, and the ladies at the workshop were also amazed at how well these colors blend together for a great fall look!  If you love these products and want some of your own, you can order them all in my online store, or you can contact me and I will be happy to take your order for you! I am going to spend the rest of the day madly stamping in my studio getting ready for tomorrow's event! I hope you all have a fabulous weekend, and try and take some time to be creative!!!
Card Recipe:
Paper - Pool Party, Soft Suede, More Mustard, Very Vanilla card stock, Spice Cake Designer Series Paper
Inks - More Mustard, Soft Suede, Pool Party classic inks
Stamps - Day of Gratitude Stamp set
Tools - Eyelet Border punch, Designer Label punch, Large Oval punch, dimensionals, sponge
Accessories - Designer buttons, Soft Suede Taffeta ribbon

October 25, 2011

THE FRAME THAT WASN'T

Hi all! Well, I promised you all yesterday that I would show you the frame I made for Tony's Grandma BUT I got it all finished, proudly showed it to my husband, and promptly packaged it all up in the shipping box and FORGOT TO TAKE THE PICTURE!!! LOL - sometimes I wonder where my head is :-) So, instead of the frame, I have a workshop card to share that I did with my workshop gals last week! It was quite the crowd with 16 of them all packed around three tables - I could have used more of ME, heeehee! We had a great time though, there was lots of laughing, and everyone enjoyed the projects which is ALWAYS my goal! I have been doing so much stamping of holiday stuff that I decided to make a project that had nothing to do with the season, lol!  This card uses two separate stamp sets:  one is a hostess set called Precious Butterflies and I absolutely love it! The other is the Creative Elements stamp set, which we used to stamp on the patterned paper itself. The base of this card is Poppy Parade card stock, and the patterned paper comes from the First Edition Specialty Collection - Yummy! We punched along the edge using the Eyelet Border punch, and then sponged the edges with Early Espresso ink. The images are stamped on Naturals Ivory in Poppy Parade and Daffodil Delight inks, then backed with some Not Quite Navy card stock. The sentiment is stamped on Daffodil Delight card stock in Not Quite Navy ink, then punched out using the Large Oval punch, and popped up on dimensionals. We tore the edge of the patterned paper (some of them had a tough time with this, they thought it was too pretty, lol) then added a small Navy designer button. Last, we used some of the Daffodil Delight Taffeta ribbon across the top of the card, and it looks so pretty!! Love that ribbon, and in every color too :-) A simple but pretty card that is perfect for workshops! I hope you like it too!! If you like the products you see here, you can purchase them in my online store OR contact me and I am happy to take your order! Don't forget the Precious Butterflies set is a hostess only purchase so if you are in love with this one (I am!) then give me a call and let's get your workshop booked! I will leave you the recipe, and then I am off to make some more pretties for my Hostess Appreciation event this weekend - can't wait to spoil those ladies :-) I hope your day is fabulous and you take some time to create something!
Card Recipe:
Paper - Poppy Parade, Not Quite Navy, Naturals Ivory, Daffodil Delight card stock, First Edition Specialty Designer Series Paper
Inks - Poppy Parade, Daffodil Delight, Not Quite Navy classic inks
Stamps - Precious Butterflies (hostess set), Creative Elements
Tools - Eyelet Border punch, Large Oval punch, sponge, dimensionals
Accessories - Daffodil Delight Taffeta Ribbon, Designer Buttons

October 24, 2011

SUPER CUTE MINI BOOK

Hi stampers!! I hope someone is reading this, I know I took quite the hiatus!! I was battling quite a bad sinus infection which ended up going into my chest and caused me all kinds of grief! And, just when I was getting over that, I caught a bad head cold that I am currently at the end of  - sheesh!!! So, I am back on track and have TONS to show you this week!!! Today I want to share a cute mini book I made for one of my husband's staff that is leaving for a new job. He wanted something they could all sign and then add pictures to from her going away party so this is what I came up with! I got to attend the party as well and she loved the book, which made me happy :-) I have several pages to show you so what I will do is list  the main products that I used as I show you the pages. As always, if you have any questions, feel free to email me, and I will do my very best to answer them! This first pic is of the cover - it's an accordion album so it is held together by the Daffodil Delight wide striped grosgrain ribbon on the side. I used Pacific Point card stock as my base for the whole album, and the patterned paper is all from the Beyond the Garden Designer Series paper collection.  I used several stamp sets in this album; the ones on the front cover come from the BFF stamp set, and the Friends Never Fade stamp set. Although you can't tell from the pic, I sprayed the accordion flower with Frost White Shimmerz - looks so pretty IRL!
In this mini I tried to keep a similar theme going for all the pages as there are some on the front AND back pages of this book. So, I am going to show you the front pages as I repeated the themes from the front onto the back. These first two pages show how I did the pockets and tags for them all to sign and leave little notes, and then there are places for pictures as well! I used the Kindness Matters stamp set, and the Just Believe stamp set for the images and the borders on these pages.  I also used the Triple Layer flower punch, I just love that! The ribbon is the yummy Tangerine Tango Scalloped Polka Dot ribbon, which you will see throughout the book. The border on the pocket was made with the Eyelet Border punch, one of my favorites that I tend to reach for over and over. There are some blingy items on this page as well - I used some of the Antique brads as well as some rhinestones and pearls - a girl has got to have bling, right??


These two pages have lots of room for journaling and also for pictures. I used my Scallop Circle die on my Big Shot to create the pull-out from the right page, which can hold two pics all on it's own. The stamp sets on the right hand page are from the Vintage Vogue stamp set.  As you can see, the pocket on the left side is a repeat pocket - I did these all the same throughout the mini and it looks great! It gave a lot of continuity to the book, and the other pages really added the pop to the book with all their different elements!
These two pages are once again showing two pocket pages, one of which should look familiar *wink* The right side is another pocket similar to the last one, but with different images. These come from the Friends Never Fade stamp set, a great set that can be used for many, many different occasions! The Eyelet Border punch was used along the diagonal of the pocket as it was on the last page I showed you!

These are the last two pages of the book, and they are primarily for placing pictures. Lots of stamping going on here as well! The butterflies are from the Kindness Matters stamp set - I just stamped them on Whisper White card stock, cut them out, and then placed some rhinestones down the center of them. I also used the Just Believe stamp set on the left page, adding some cute little pink flowers punched out with my Bitty punch.  And of course, I added some pearls :-) The outline of the Scalloped Square shape is left from the Scalloped Square you see on the front of the album cover - I hate to let it go to waste so I used it here. Another stamp set used on the right page is called My Friend, and it is one of the first stamp sets I purchased from this catalog, I just love it! Lots of fun images to play with :-)  So, there you have all the pages (some I did not show as they are duplicates of ones you see here) of the cute mini I made for a going away gift! This is the best part of being a scrapper and stamper, that I get the chance to make these handmade gift items for people - I just love how much they appreciate them - much better than a sweater, don't you think??!! Although, I tend to give both, lol!  If you like any of these items you see here, you can purchase them in my online store, or contact me and I will be happy to take your order. I hope the pictures are clear enough for you to see, there was not the best light when I took them, and well, I don't have the book anymore to get better ones, lol! I will be back tomorrow with a frame that I made for my husband's grandma who turned 86 yesterday! Yep, another handmade gift item :-) Until then, I hope you have a wonderful Monday, and take time to stamp something!

October 12, 2011

A LITTLE SNEAKY PEEK :-)

Hi all!!! I hope you are having a fabulous week - I can't believe it's already Wednesday, this week is flying by! I have been super busy getting ready for yet another craft show, class, and workshop this weekend! And, I am still fighting this awful sinus infection, although I am hoping I am on the downhill side of it now. Sheesh - three rounds of antibiotics and it's STILL here! I don't have time to be sick, lol! I have a super cute Halloween mini book class on Friday night (if you are local and want to attend, I still have a few seats left) and so I thought I would give you a peek at the cover - I can't show you all the pages until after the class since they paid for it :-) I used the Pick Your Poison Designer Series Paper and the Piece of Poison stamp set from the Holiday mini - both are so much fun!! It's a 6x6 mini chipboard book, and has twelve pages chock full of fun images, embellies, and of course places to put those special Halloween pictures!  It is held together by metal rings decorated with lots and lots of our ribbon(not shown here). There are four images featured here from the stamp set including the title.  The spiderweb is stamped in Basic Gray classic ink and the spider is stamped over top of it in Black Stazon on Naturals Ivory card stock. That fun accordion flower was super easy to make using my Simply Scored, which you can also find in the Holiday mini.  If you don't have  this tool, you NEED one - it is soooo fabulous and opens up a whole new way of doing all your scoring quickly, and accurately! The skeleton is stamped in Black Stazon on Peach Parfait card stock that was distressed using my distresser tool, then sponged with black ink. The title is stamped in Black Stazon on Naturals Ivory card stock that has been sponged with Peach Parfait classic ink.  And, you know me and my pennants, I had to do it again, lol! It is mounted on dimensionals so give some added depth to the cover. The ribbon is Peach Parfait twill ribbon - love it!!! So, this is just the cover - imagine what is on the inside!! *wink* Once I have held the class, I will show you all the fun pages inside :-) If you NEED any of these products featured here (and you know you do heeheee!) you can purchase them in my online store or contact me and I will be happy to place the order for you!  And remember, you can still take this class if you are local, just give me a shout and I will reserve you a spot! Today is laundry day so I will be doing some fun crafty projects in between folding and putting away, lol! Have a wonderful day and make sure you take some time to be creative, it's good for the heart :-)
Cover Recipe:
Paper  Peach Parfait, Naturals Ivory card stock, Pick Your Poison Designer Series paper
Inks - Black Stazon, Basic Gray, Peach Parfait classic inks
Stamps - Piece of Poison
Tools - Simply Scored, Distresser Tool, 1 1/4 inch and 1 3/8 inch circle punches, dimensionals, sponge
Accessories - Peach Parfait Twill ribbon

October 4, 2011

PRETTY NETTING

Good morning all!!! Well, it's not such a great morning for me - seems I have a nasty sinus infection, probably from all the extreme changes we have had in the weather lately.  It went from 93 one day to 60 the next, back up to the 100s and now below 60 again - I mean, really??? No wonder everyone is sick :-( However, I have so much to do that I can't let it keep me down, so I will be off to see the man with the good stuff later on today, lol!! In the meantime, I thought I would share my second swap card with you! I was signed up to do the Netting background stamp, but since it IS a background stamp, I used other sets on here too :-)  I wanted a nice, bright, and cheery card so I went with Tangerine Tango card stock for the base, with some Daffodil Delight and Pacific Point accent papers, and I love it!! The Netting stamp is done with Tangerine Tango classic ink on Whisper White card stock to make it really pop! Then, I used the flourishes from the BFF stamp set - such a fun stamp set, I can't believe it took me this long to ink it up!  Doesn't it look like a patterned paper?? I love making my own, so fun!! The main images and the sentiment are from the Hostess stamp set Precious Butterflies - Looooove it!!  I stamped them on Whisper White card stock, and then softly sponged Pacific Point ink over the top.  I backed the image with a Scallop Circle that I cut out on my Big Shot. The sentiment is stamped on Wild Wasabi card stock, then punched out using the Decorative Label punch, and popped up on dimensionals over a piece of Old Olive thin grosgrain ribbon.  I was worried that it would look funny mixing the greens, but nope, looks great!! I again kept it simple since I needed to make so many of these, but I think it turned out pretty, and I hope my swap group likes it too *wink* If you like any of the products I used here, you can purchase them all for yourself in my online store! Or, if you would rather, you can contact me and I will be happy to place the order for you :-) Now, I am off to get ready for the doctor, ugghhhh!! I hope you all have a fabulous day, and take time to be creative!! See ya manana!!!
Card Recipe:
Paper - Tangerine Tango, Daffodil Delight, Pacific Point, Wild Wasabi, Whisper White card stock
Inks - Old Olive, Pacific Point, Daffodil Delight, Tangerine Tango classic inks
Stamps - Netting background stamp, BFF, Precious Butterflies(hostess set)
Tools - Big Shot, Scallop Circle Die, 3 1/2 inch Circle Die, Designer Label punch, Dimensionals, Sponge
Accessories - Old Olive thin grosgrain ribbon

October 3, 2011

IT'S A SWAP!

Good Monday morning stampers!! I hope you had a fabulous weekend! Mine was extremely busy with the Card Buffet and a workshop - whew!! I don't think I really had time to register it was the weekend, lol! And, it's now October - can you believe it??!! I can't - the months are flying by :-) Pretty soon it will be....oh, never mind - I don't want to go there, LOL!!! One of the things I love to do is swap - it gives me samples of some wonderful cards with different styles and great techniques that I may not have done in awhile or may be new to me.  I recently participated in a swap where we had to sign up for a certain catalog set and we would then get different set samples back! Since the swap is now closed and sent back, I can share one of the sets (I did two) that I chose with you today! The set I chose was Established Elegance because I love the vintage look and feel to this set, and wanted an excuse to try out the typewriter, heehee! The base of this card is Soft Suede card stock and I paired it with the beautiful Beau Chateau Designer Series paper -isn't it yummy??! I kept the card fairly simple because I needed 20 of them, but still wanted that WOW! factor :-) I stamped the typewriter in Soft Suede classic ink on Naturals Ivory card stock and then I cut it out.  I then popped it up on dimensionals over a square of the same card stock that I stamped with several of the other images in this set using Blushing Bride classic ink. I inked the edges in Soft Suede ink, rounded the corners, and then adhered the whole thing to a Scalloped Square that I cut out on my Big Shot(did you know you can get one of these FREE??).  I also folded down one of the corners and added a vintage brad, and stamped another one of the beautiful images in the corner using Soft Suede ink.  I then decided to stamp my sentiment (from the Petite Pairs stamp set) on another piece of Naturals Ivory and roll it like a scroll coming out of the typewrite - cute, right?? Lastly, I added some Victorian Lace ribbon and the card was done! Like I said, simple - but still very pretty, don't you think?? I hope the swap ladies like it :-) I had fun making it, I love to design cards just because! I have another swap card since I signed up for two, and I will share that one tomorrow :-) If you like the products you seen here, you can order them in my online store, or contact me and I will be happy to take your order for you! Also, don't forget about all our wonderful specials this month - click here and you can see them all in one place :-) Now, I am off to work on some of my craft fair projects and some workshop items - very busy day here in the Hobson stamp studio, lol!! I hope you all have a wonderful day, and I will be back tomorrow, promise!! In the meantime, I hope you take the time to be creative, it does the heart good!!
Card Recipe:
Paper - Soft Suede, Blushing Bride, Naturals Ivory card stock, Beau Chateau designer series paper
Inks- Soft Suede, Blushing Bride classic inks
Stamps - Established Elegance, Petite Pairs (sentiment)
Tools - Big Shot, Scallop Squares Duo Die, Corner Rounder, Ticket Corner Punch, dimensionals, sponge
Accessories - Victorian Lace, Vintage brads

October 2, 2011

WANT A FREE BIG SHOT OR A $100 SHOPPING SPREE??!!

Happy October everyone!!! YAY! It has finally started cooling down here in Northern Cali - 70s in the forecast all week here - whoohooo!!! I had a wonderful day yesterday celebrating World Card Making Day by hosting a Card Buffet where there were all sorts of different cards to stamp for a $1 per card - it was sooo much fun!! Lots of people came, and there was lots of laughter, stamping, and just a great time!! This past week has been CRAZY busy, and I have been fighting a pretty bad sinus infection BUT I wanted to let you know today of the exciting news from Stampin' Up!  This month - it is AMAZING!!!! Check out these specials - they are going to blow your mind :-)  See that picture above?? Yep, it's true - a FREE BIG SHOT, WHOOHOOOO!!! Here are all the details:

From October 1st-31st anyone who signs up to be a demonstrator will have their choice of a FREE BIG SHOT OR A $100 SHOPPING SPREE - YOUR CHOICE!!!! WHOOHOOO!!! - ISN'T THAT AMAZING!!!! In addition, the new-demonstrator starter kit (an amazing deal for only $175) contains $310 worth of stamp sets, card stock, ink, accessories, and all the business supplies you need to get started!!! And, if you want to customize this kit so that you get the stamps YOU want, the inks YOU want, etc. you can also do that!
SO, ARE YOU READY FOR YOUR FREE BIG SHOT??!!! Simply click here and you are on your way to an unlimited amount of creativity, a wonderful new family of stampers, and FUN!!! But hurry, this offer is only good until October 31st, and just like all the witches, warlocks, ghosts, and bats they will be gone :-) AS AN ADDED BONUS, IF YOU JOIN MY TEAM DURING THIS PROMOTION, YOU WILL BE ELIGIBLE TO JOIN MY NEW RECRUIT BIG SHOT CLUB!!  You will learn all kinds of wonderfully fun ways of using your Big Shot so YOU can get the most out of your new toy :-)
 
If you have any questions or want to know more about being a demonstrator, please don't hesitate to contact me! You can email me or call me at (530)589-6900 - I am happy to chat with you about how wonderful it is to be a demonstrator :-)

Have a wonderful Sunday!!

September 26, 2011

MORE CHOCOLATE FUN!

Good Monday morning!! Well, so far so good, lol!!! I had a wonderful weekend although no crafting time BUT I think sometimes it's good to step away and do some other fun things like SHOPPING :-) Although I did some crafty shopping, heehee!!! Got some frames for Christmas presents - now just to get them done :-) Hopefully I will be able to share some of those soon! Today I am going to share another one of our chocolately projects we did in Chicks and Chocolate class last week! This is a cute little candy holder that has a cello bag full of treats inside! The base of this project is Concord Crush card stock and I have decided this is a PERFECT color for Halloween projects, lol! I love it paired with the Daffodil Delight card stock as it is here!  The flap of the holder is border punched with the Scallop border punch, and then Daffodil Delight grosgrain ribbon is threaded through the entire holder to keep it closed.  As you can see, there are several layers on the front, including a piece of very fun patterned paper from the Frightful Sight Designer Series paper pack.  It has bats all over it with spider webs, super cute!! The image is stamped on a 3 inch circle cut on the Big Shot and nests inside a 31/2 Concord Crush circle also cut on the Big Shot.  The image itself is stamped in Black Stazon and is from the House of Haunts stamp set - one of my favorite Halloween sets! The sentiment and bats are from the Wicked Cool stamp set, and pairs perfectly with the house! It is stamped on Daffodil Delight card stock, then punched out with the Modern Label punch.
The real fun part of this little holder is the inside - that's where the chocolate is!! Well, it is if your teenagers don't see the chocolate - no more in there now, LOL!!  This is a side view of the holder so you can see how it holds the treats. There is a medium cello bag secured inside the holder with red sticky tape, and because the cello bag has a resealable flap, this little treat can be refilled again and again (well, if you want *wink*) It actually holds quite a bit of candy and could hold a couple of mini chocolate bars, lots of m&ms, and of course the hershey kisses you see here! This is a wonderful little treat holder that makes a great gift for your kiddos or your sweetheart - I plan on making a bunch of these for Tony to take to work and hand out to some of his staff members.  Well, I didn't REALLY plan on it, he begged me to do it, heehee!! I can't resist that man so yes, I will do that for him! He only needs FORTY of them, ROFL!!! It will be fun to do and I can play around with different images and such!! I hope you like this cute little treat holder! If you like the products you see here, you can order them in my online store, or you can contact me and I will be happy to take your order for you! I will be holding another Chicks and Chocolate class for Christmas treats as well, so if you would like to make these fun holders with me and some other stampy friends, watch the calendar for the class listing :-) Now, I am off to the post office to mail out some cards to friends (love to send handmade cards) and get ready for the week! Have a wonderful day, and I hope you take some time to create something!! I will be back tomorrow with the last two chocolate treat holders! Until then, happy stampin'!
Treat Holder Recipe:
Paper - Concord Crush, Daffodil Delight, Whisper White card stock, Frightful Sight Designer Series paper
Inks - Black Stazon, Daffodil Delight stampin' write marker, Concord Crush classic ink
Stamps - House of Haunts, Wicked Cool
Tools - Simply Scored, Big Shot, 3 and 31/2 inch circle dies, Scallop border punch, Modern Label border punch, Crop-o-Dile, Red Sticky Tape
Accessories - Cello bag, Daffodil Delight grosgrain ribbon