September 23, 2010

IT'S BEGINNING TO LOOK....

a lot like Christmas!! Seriously, I went into Kohls the other day, and the entire back of the store is all Christmas already....I mean, what happened to all the holidays in between? No wonder people feel stressed,t they think they are behind and forget it's only September, LOL!  I have not started my Christmas shopping yet - that starts next month.  However, I HAVE started on my cards and so have my customers - we just did a really fun Santa in September class which was great! We each got 15 cards done, whoohoo!! This one I am sharing today is one of five designs we made.  Isnt' it purdy??!! I think Crumb Cake is the perfect base for just about anything and I am loving it here! The stamp set we used is called Peaceful Season, which is a Hostess Level II set in the Holiday Mini. I was fortunate enough to receive this set FREE when I went to Convention - how cool is THAT??!!  Love Stampin' Up! and how they spoil us demos :-)  This is a beautiful stamp set, I love how elegant it is, especially the sentiment stamps!  I paired the stamps with the Deck the Halls designer series paper as well, looks great together! And, check out that ribbon - it is the new Cherry Cobbler Seam Binding ribbon, also found in the Holiday Mini: it also comes in Very Vanilla and Always Artichoke and is soooooo pretty and easy to work with! This card came together quickly but really turned out very elegant! If you are interested in ANY of the items used to make this card (and you KNOW you are, LOL!) you can purchase them from my online store OR you can send me an email and we can put the order in together! :-)  Now, I am off to put the finishing touches on my workshop tonight but I will be back tomorrow  to share the cute project we are making - sooo spooky, heehee!  Have a fabulous day and thanks sooo much for stopping by and leaving me some love!!!
Card Recipe:
Paper - Crumb Cake, Very Vanilla card stock, Deck the Halls Designer Series Paper
Inks - Basic Black, Always Artichoke, Cherry Cobbler classic ink pads
Stamps - Peaceful Season Level II hostess set (holiday mini)
Tools - 3/4 inch circle punch
Accessories - Cherry Cobbler seam binding ribbon, pearls

September 21, 2010

FROSTY IS COMING TO TOWN!

Good morning all!  It's a beautiful day here in Northern CA! I just love when it starts to cool down, but the sun is out, there is a little breeze going - makes me HAPPY!!!  And, since I have lots of stamping to do today, that makes it even better! But first, I wanted to share another fun Christmas card with you - isn't this cute??!!! I just love snowmen, I collect them in all shapes and sizes and at Christmas, they are all over my house, LOL!  This little guy makes me smile - he is from the Jolly Old Saint Nick stamp set found in the Holiday Mini! All of the stamps in this set are adorable! I used the snowflake stamp and stamped all over the base of the card in Baha Breeze classic ink- love it! And, I had to use some more Candy Cane Christmas Designer Paper, it is soooo yummy and the colors are fun! I added a smidge of  Real Red card stock that I punched using the Eyelet Border punch - I love how it makes the card pop! My main image was soooo much fun to do - Frosty is stamped in Stazon, then accented with some Real Red marker.  I used my two-way glue pen and dabbed all over and around him, then covered the ground underneath his feet.  I then added the chunky white essentials glitter and voila! SNOW!!! Doesn't it look real?? I love this stuff and one of my customer said that now she wants to order it in all colors and use it on her nails, LOL!  Too too fun!  I finished it off with the sentiment and some Whisper White grosgrain ribbon and the card was done!!! Soooo much fun to make this one, we had a great time and everyone was tickled with this!  See something you just have to have from this list of goodies (I know you want it ALL, heehee!) Check it out - you can go to my online store and order whatever you want!!!   And, if you have any questions, just email me and I am happy to answer them!  I will leave you the recipe and then I am off to run a few errands and then home for some serious stamping! I just love my job!!!!  I will be back tomorrow with some fun things to share - see you then!
Card Recipe:
Paper - Baha Breeze, Real Red, Garden Green, Whisper White card stock, Candy Cane Christmas Designer Series Paper
Inks - Black Stazon, Real Red classic ink, Real Red and Basic Black stampin' write markers
Stamps - Jolly Old Saint Nick
Tools - Eyelet Border Punch, Ticket Corner Punch, Designer Label Punch, Wide Oval Punch
Accessories - White Chunky Essentials Glitter, Two-Way glue pen, Whisper White narrow grosgrain ribbon

September 20, 2010

MORE CHRISTMAS!

Good morning all!! Whew! I had a VERY busy weekend! I taught classes and then had a craft fair all day yesterday so I am wiped out! Me thinks I need to add some time in there for me - LOL!!! Seriously, too much in one weekend BUT it was all fun! I did sleep for thirteen hours last night - can you believe it??!!! I went to bed at seven last night - that NEVER happens! I think my body was telling me something......but I feel GREAT today, heeehee! I wanted to share another one of the cards we did in my Santa in September class.  Isn't this a beautiful stamp set? I love the elegance this image has - makes me happy!! The background is actually stamped with the French Filigree background stamp in Cherry Cobbler classic ink and it looks really purdy with the Gifts of Christmas set we used for the main image.  And, in keeping with the vintage feel, we used the new holiday mini designer series paper Deck the Halls, which I just absolutely LOVE!!! A little Victoria lace along the bottom along with a bitty button and the card is done!  Simple but beautiful I think - they loved it and this is probably one of my favorite Christmas cards I have made so far! I hope you like it too! And, since I just know there are items on this cad you HAVE to have LOL!! Here is the link to my online store so you can order some of your very own!  I will leave you with the recipe as well so you know what everything is - I am off to get ready for my downline meeting tomorrow, then two classes and two workshops later in the week! Enjoy your Monday!!!!
Card Recipe:
Paper - Cherry Cobbler, Crumb Cake, Very Vanilla card stock, Deck the Halls Designer Series Paper (holiday mini)
Ink - Cherry Cobbler classic ink pad
Stamps - French Filigree background stamp, Gifts of Christmas stamp set
Tools - Scallop border punch, mat pack and paper piercer
Accessories - Victoria Lace Ribbon, bitty buttons

September 16, 2010

SANTA IN SEPTEMBER

Good morning all!!! I hope you are having a fabulous week! I am, but just very busy, LOL!! I love it though - keeps me out of trouble *wink*  I wanted to share one of the cards we made in my Santa in September class last week - I love having these classes because it helps get all the Christmas cards we all need DONE before the holidays so there is no mad scramble in December, lol!  We made five cards in all so I will share some more with you all tomorrow.  This first one is definitely not yoru traditional colors of Christmas but I think it is super cute all the same! It uses the stamps set Greeting Card Kids, which has adorable images for several different holidays and they are sooooooo stinkin' cute - they bring back the old fashioned feel to holidays that seems to be missing sometimes.  Look at that little one - isn't she just as sweet as can be??!!  I paired her with the Candy Cane Christmas designer paper from the holiday mini, which pretty much dictated my colors of Baha Breeze, Garden Green, and Blushing Bride along with some yummy Real Red! I love all these colors but would not have thought of putting them together myself - Stampin' Up! is amazing that way :-)  The background is embossed on the Big Shot using the finial press folder - love it!! I colored my little cutie in with Stampin' Write markers, then added some dazzling diamonds underneath her for the snow effect.  And, of course I had to have some ribbon and a yummy button with some bling to top it all off! The ladies loved this card and I love how it turned out! If you see something on this card you have to have (I know you do, LOL!) you can order from my online store and it will come straight to your door!  So, today is dedicated to prepping for class tomorrow night and working on some projects for the Harvest Festival this weekend - lots going on around here, LOL! Have a fabulous day and I will be back tomorrow to share another fun card we made in class! Till then - Happy stampin'!!!!
Card Recipe: 
Paper - Baha Breeze, Garden Green, Blushing Bride, Real Red, Whisper White card stock, Candy Cane Christmas designer series paper
Inks - Stazon, Stampin' Write markers (Baha Breeze, Real Red, Blushing Bride, Garden Green, Basic Black) Real Read Classic ink
Stamps - Greeting Card Kids
Tools - Big Shot, Finial Presss embossing folder, Scalloped edge border punch, ticket corner punch, word window punch
Accessories - Real red 1/8 inch ribbon, Garden Green designer button, rhinestones, dazzling diamonds, liquid glue

September 15, 2010

IS THERE SUCH A THING....

as a witch owl??!! LOL - there is now!!! I wanted to make a fun card for this week's sketch challenge over at Stampin' Connection, using my owl punch and some of the fun new Halloween stuff we have! So, this is what I came up with - a witch owl, heeeheee!!! I think she is cute if somewhat awkward in shape :-)  I made this a square card - this is usually my favorite size but I have not been making as many this way because it seems to mail them is not as fun! I learned that the hard way by doing almost all my Christmas cards this size last year, ugggghhhhh!!! But, for this one it had to be a square card and I love it! I used my fun stamp set called Wicked Cool - I cannot get enough of those fun witches feet, lol! And, I love bats - I stamped them all over the background as well as on the main image - too too cute, right??! And, I broke out my Big Shot, cutting a scalloped square from the Nite Owl Designer series paper found in the main catty. Super cute - there is even a piece in there with fuzzy black circles on it that would make great spiders, heehee! Then, I used my scalloped circle and my regular circle dies, which formed the main image.  And, since no card in my mind is complete without SOME ribbon, I added some Basic Black satin ribbon - can you say YUM!!!  Loooooove it!!!! I also played with my new border punch called the Dotted Scallop Ribbon border - isn't it fun??!!! I love how it can be used like ribbon.....there is no such thing as too much ribbon, right??!  I had sooo much fun making this card - it just makes me happy! And, I will be stamping away the day as I get ready for class on Friday and a big craft fair on Sunday! If you are local, come on over to Durham where the Harvest Festival will be going on and stop by and see me! You don't want to miss out on my make n' takes *wink*  Thanks so much for stopping by and if you have to have any of the things I used on this card (you KNOW you do, LOL!) go on over to my online store where you can place an order with me fast and easy!  Be back tomorrow with some of my Santa in September cards we did in class - such fun!
Card Recipe:
Paper - Pumpkin Pie, Basic Gray, Whisper White card stock, Nite Owl Designer Series Paper
Inks - Basic Black and Pumpkin Pie classic inks
Stamps - Wicked Cool
Tools - Big Shot, Scalloped Circle, Scalloped Square, and Circle Bigz Dies, Dotted Scallop Ribbon border punch, Owl Punch
Accessories - Basic Black satin ribbon

September 9, 2010

BABY BUNDLE BABY SHOWER GIFT

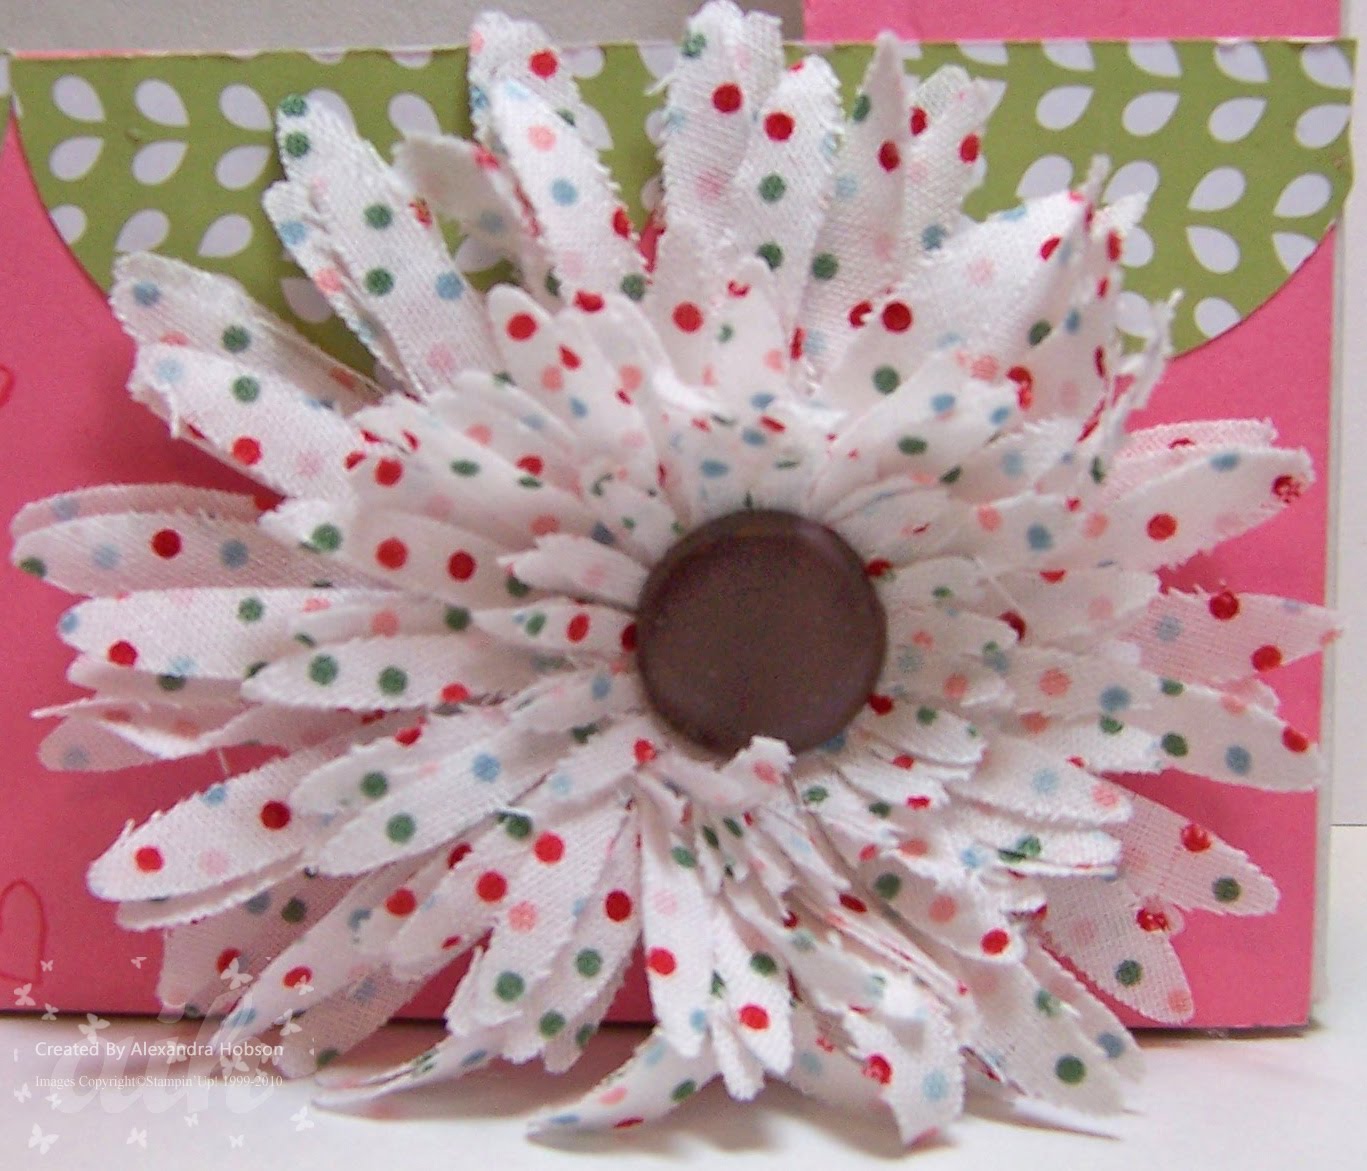
Hi all!! Well, I was up very late last night since my husband told me at SIX last night that he would need a baby shower gift and card for one of this employees since the shower is TODAY!!! Sheesh - I had to drop everything and figure out what to do! I think he thinks I just do these things in a minute then move on to the next thing, LOL! I have been kicking around this pattern for a frame in my head and on paper, so I decided to try it out - and it worked!!! I used heavy chipboard that I had in my stash for this as I wanted it to be pretty sturdy.  I plan on putting up some directions later on next week if anyone is interested! I have to say, I  think it turned out pretty cute, if I do say so myself *wink* And, I finally got to use our new fabric, whooohooooo!!! I have wanted to use it on something other than a card and this gave me the perfect opportunity! I cut out flowers from the Candy Cane fabric using the Daisy die on the Big Shot - four of each flower so it is nice and fluffy! I hot glued them all together and used my heat gun to fluff it all up and curl the edges!! Then, I added a Chocolate Chip jumbo brad and  voila! a flower!!! LOVE, LOVE, LOVE it!!!! 
Here is a close up - isn't it fun??!! So, now I want to make a ton more, LOL! I have to get out my fabrics after my class tonight and play some more, heeehee!  I wanted it to go with the Nursery Suite specialty DSP (soooo stinkin' cute!) that I used, so I added some Real Red accents on the frame, which allowed me to use the fabric.  I also inked up my Baby Bundle stamp set for the first time - such adorable little stamps! I did a lot of cutting so I could build the little baby carriage full of baby goodies, and then I stamped the little images all over the front AND the back of the frame! Yep, I did stamp on the back, I wanted to make sure the frame would look good no matter where she put it or what angle it sat at so I also added some of the patterened paper in the back where the ribbon goes through. 
Here is a pictue of what it looks like - I think it looks finished, right?  And, I love all the ribbon lined up neatly across the top, just makes me happy, lol! I know, I am weird BUT I do love my ribbon and there is lots of it used here - the Early Espresso, Real Red, and Pear Pizzazz are all twined together and really makes the frame look cute at the top! I also added a row of designer buttons to the fron to cover the ribbon holes and then added some of our pearls and rhinestones to give the frame some bling - I mean, every girl should have bling right??!! And, so this one will start out with it from the beginning, LOL!
Here is a picture of what they look like up close - sooooooo pretty with all their little sparklies!  Now my daughter wants me to make a frame for HER that has bling - so that will be something I work on this weekend in between everything else, HEEHEE! (I love it though - she is taking an interest again in crafting, which makes my heart go pitter pat!)
And, what is a frame with out a card to go with it??! So, I used the sketch challenge at Stampin' Connection this week to design this cute card to go with the frame using the same papers and embellies - and yes, I did the inside!  I wanted it to be a fun card so I again cut out all the little stamps from the Baby Bundle set, then colored them in with my Stampin' Write markers in the same colors as the one on the frame so it would coordinate! I had such fun designing this set.....even though I was not given very much notice to get this one, LOL!
And, one last picture of the full set together - even my husband loved it and said over and over again how pretty it was and how much she will like it! And, if she doesn't, no worries - I have never met her so she can't pick me out of the crowd.....I am hoping she does though, it's her first girl, her other two are boys!  I hope you like my baby gift set - I know I rambled on and on today, LOL! I will leave you with the recipe, and I am hoping to get a tutorial up on how to make the frame - it is an 8x8 frame, so nice sized for a dresser or your desk at work.  Have a fabulous day and thanks for stopping by, I am off to finish up prepping for my Santa in September class tonight - whooohoooo!!!  Stamping and friends, love it!!! Here is the recipe and if you have any questions about anything email me and I will get back to you! If you have to have any of these fabulous products (and you know you want them ALL :-)) you can go to my online store and order them for yourself!! See ya!!
Card and Frame Recipes:
Card:
Paper - Baha Breeze, Chocolate Chip, Whisper White card stock, Nursery Suite Specialty DSP
Inks - Chocolate Chip, Regal Rose, Real Red classic inks, Pear Pizzazz, Regal Rose, Real Red stampin' write markers
Stamps - Baby Bundle
Tools - Scallop Circle Punch, 1 3/8 inch circle punch, 3/4 inch cirlce punch, Dots embossing folder, Big Shot, Eyelet border punch
Accessories - Pretty in Pink satin ribbon, designer buttons
Frame:
Paper - Regal Rose, Whisper White card stock, Nursery Suite Specialty DSP
Inks - Baha Breeze, Regal Rose, Real Red, Pear Pizzazz stampin' write markers, Regal Rose classic ink pad
Stamps - Baby Bundle
Tools - Big Shot, Daisy number two die, 1 3/4 inch Circle Punch, Eyelet Border Punch, Crop-a-dile
Accessories - Candy Cane Christmas fabric, Designer Buttons, Early Espresso, Old Olive, Real Red thin ribbon, pearls, rhinestones, Big Brad, Candy Cane fabric

September 8, 2010

WATERCOLOR TRIO WORKSHOP CARD

Well, another long weekend has come and gone and the weather sure has turned a lot colder all of a sudden - went from 100 degrees and HOT to 70 and breezy.....so, a little bit chilly for the pool but we are hopeful we will get at least one more weekend out of it! I hope you all enjoyed your weekend! We sure did, lots of family time, which is always good.  However, now I am behind and so I am scrambling to get caught up - I swear that is the story of my life, LOL! Lots of stamping, paper cutting, and ribbon tying going on around here!  I did want to share something crafty with you all today though so I this is one of the cards I did in a workshop a few weeks back. Now I know it is a little bit more than you see on an average workshop card, but this group was a bunch of seasoned stampers and scrappers and just new to me, not the craft so I wanted them to not be bored.  I think it was a good decision because they all loved it! The embossing was done on everyones except one - I always leave one and that one is randomly put into a kit and whoever gets the kit gets to try out the Big Shot, emboss their card stock and are the winners of a door prize! Makes it fun for everyone, lol!   Lots of layers but simple layers that came together quickly.  The color combination is Peach Parfait, Not Quite Navy, and Pear Pizzazz and not one I would have come to use on my own  BUT, I did consult my Color Coach for this one and I am lovin' the result!! I think everyone should have a Color Coach - even the most seasoned crafters can benefit from the fun and creative combinations that are listed on these cards! It is available in the catalog as well so get on over to my online store and order yourself one, you will be so happy to have it.  And, I paired these fabulous colors with the Watercolor Trio stamp set (sorry, it is gone now as it was in the Summer Mini) stamping the images in like colors, keeping the card bright and summery! I also used the fabulous background stamp called Pretty Patterns: it may be a little hard to see as I stamped it on the Peach Parfait in the same color, but it looks great IRL!  I like this card, it makes me happy! However, I did demo a card showing some techinques on how to "step it up" a bit, taking a very pretty card to a GORGEOUS card :-) 
Here is my sample with all the new techniques added!  As you can see, the basic layout of the card remains the same, but there are a few changes that really stand out! One is the image - instead of stamping in one color, I colored the image using my stampin' write markers that matched all that yummy card stock: doing this allowed the image to take on a more watercolored look AND makes it pop! I also used the Ticket Corner Punch on the card stock layers, adding some definition to each one. The main image is also sponged with Peach Parfait classic ink, while the outside card stock layer has faux stitching done with my mat pack and paper piercer. The Pear Pizzazz card stock is still embossed using the Elegant Lines embossing folder, but it has also been lightly rubbed with my Whisper White craft ink making the embossing really stand out!  Lastly, the sentiment is popped up on dimensionals and was inked around the edges with Not Quite Navy classic ink, adding some dimension and texture, which really catches the eye!  I enjoyed the extras added to this card, and I think it shows many ways to change a card a lot by doing really very little!  And, it is always fun to demostrate a card that you have done lots of fun techniques to - at least it does me, it makes me HAPPY!!! I hope you like my two different takes on my one card - it is probably the last summer card I will be doing for awhile! I have been knee deep in Halloween, fall, and Christmas already - YIKES!!!  Super fun stuff though - I will be sharing some really cute cards tomorrow made from products out of the new Holiday Mini! Thanks so much for stopping by, I am off to get some stamping done, WHOOOHOOO!
Card Recipe (stepped up version)
Paper - Peach Parfait, Not Quite Navy, Pear Pizzazz, Whisper White card stock, Greenhouse Gala designer series paper
Inks - Peach Parfait, Not Quite Navy, Pear Pizzazz stampin' write markers and classic stampin' pads, white craft ink
Stamps - Pretty Patterns background stamp, Watercolor Trio (no longer available)
Tools - Big Shot, Elegant Lines embossing folder, mat pack, paper piercer, Designer Label Punch, Ticket Corner Punch, sponge
Accessories - Peach Parfait ribbon, Stampin' Dimensionals