July 7, 2010

SUMMER FUN CARDS

Hi all! Here it is, Wednesday already, the week seems to be flying by - probably because I have sooo  much to do, LOL!! I wanted to share to summery cards I made using lots of new product and colors - I am switching around my combinations to find which new colors are going to be my faves, heehee!  This first one is actually a set from the Summer Mini called King of the Grill.  I love this super fun guy, he always makes me smile! I paired him with some of the Island Oasis Designer paper, added lots of layers, and stitched all around them.  I enjoyed putting this card together, it was fun and relaxing to just play around with different things!

This next card I used all new items from the catalog - soooo lovin' the new colors, papers, and ribbons!  The stamp set is called Friends Never Fade and I just love it!  I used the new Daffodil Delight card stock - what a fun,summery yellow! And, I broke out the new In-Color card stock called Pear Pizzazz, which is a beautiful green!  And, I was excited to play with an old favorite in Tangerine Tango! The designer paper is called Greenhouse Gala and is so pretty I did not want to cut into it, LOL! But, I made myself so I could show it to you here! And, check out that cool, thin ribbon - just really adds to the card!!  I love how this card turned out and will have to remember this color combo - it speaks to me, heehee!!! I hope you like my summery cards, I sure had fun making them! Thanks so much for stopping by to visit, I just love when you do! Now, I am off to blurf for awhile and then to the gym I go - I need to work off the weekend festivities *wink*  Have a wonderful day!
Card One:
Paper - Real Red, Tempting Turquoise, Pumpkin Pie, Whisper White card stock, Island Oasis Designer Series Paper
Inks - Black Stazon, Stampin' Write Markers (Going Gray, Basic Gray, Real Red, So Saffron, Old Olive)
Stamps - King of the Grill
Accessories - Photo Corners Punch, Modern Label Punch, Real Red Wide striped ribbon, buttons, twine, Mat Pack, paper piercer
Card Two:
Paper - Daffodil Delight, Tangerine Tango, Pear Pizzazz, Very Vanilla card stock, Greenhouse Gala Designer Series Paper
Inks - Tangerine Tango(classic ink pad), Daffodil Delight(Stampin' Write Marker)
Stamps - Friends Never Fade
Accessories - Vintage Wallpaper embossing folder, Scalloped Edge border punch, Scallop border punch, Daffodil Delight 1/8 inch taffeta ribbon

July 5, 2010

ARTISTIC ETCHINGS - STAMPIN' CONNECTION SKETCH CHALLENGE

Hey all!! I hope everyone had a wonderful Fourth of July!! We enjoyed a nice day of bbq and fireworks - pretty low key but nice.  And, I had a little time to stamp, which is always great!  Today is the Sketch Challlenge over at Stampin' Connection and it was my turn to create the sketch!! I hope if you are a demonstrator you will go and check it out and play along!  Just make sure you upload to the gallery using SCCSC24 in your tag so that it goes to the right folder :-)  So, I am sharing my sample here today using the new stamp set called Artistic Etchings.  I love the vintage feel of this stamp set and it pairs so well with our new designer paper called Newsprint.  I also used the new embossing folder called Vintage Wallpaper and just love it! Topped with some pretty black satin ribbon and Very Vanilla hodgepodge hardware, it came together nicely!!! I hope to see some great cards with this sketch - and for those of you who are not demos but would like to play along with the sketch, here it is for you to do so!
If you do play along, make sure to let me know and give me the link so that I can come and check it out - I would love to see what you do with it!!! Today I am off to Roseville with my kids to do some shopping - not sure why we need to go shopping, but they really want to so why not, right?? LOL - spending money is something I definitely have a talent for *wink* And, I have some time this afternoon reserved to go blurfing and check out what you all have been doing - I just love to see all the beautiful creations out there! Enjoy your day and thanks so much for stopping by, I love each and every comment!!!
Card Recipe:
Paper - Basic Black, Very Vanilla card stock, Newsprint Designer Series Paper
Inks - Basic Black classic ink
Stamps - Artistic Etchings
Accessories - Distressor tool, sponge, Basic Black wide satin ribbon, Very Vanilla hodgepodge hardware, small oval punch

July 2, 2010

JUNE CLUB PROJECTS

Hi all!! WOW!! I surely did not mean to miss blogging the last few days, but man, this week has been BUSY!! Between closing out the last catalog, starting up the new one, and entertaining my kids, I cannot seem to catch my breath! I need more hours in the day, LOL!!!  So, today I wanted to share two of the Club projects I did with my fabulous Club gals this month! We did embossing on vellum and making flowers out of punches as two of our techniques this month, and so I am going to share the two cards that showcase them.  The first one is the embossed vellum card we did using the Fifth Avenue Floral stamp set and the now retired Bermuda Bay In-Color patterned paper, card stock, and stampin' write marker.  Each flower is stamped in versamark on to the vellum paper, covered in white embossing powder, then heat set.  Then, each flower is colored in from the back side of the vellum, creating these beautiful flowers!! We added some white organza ribbon and some silver brads, but really did not embellish this card too much so the images could stand out! I think this is one of my favorite techniques to teach, it always results in such beautiful images!
This second card has several different techniques going on, but the one one most notable is the flower that is made out of paper punched using the Eyelet Border Punch.  The So Saffron card stock is spritzed with the same color ink using the Color Spritzer tool.  The DSP  is cut out using the Scallop Square Bigz Die for the Big Shot, and a piece of Certainly Celery card stock is across the bottom of the card, having been embossed using the Square Lattice embossing folder, and then punched using the Scalloped Edge Border Punch.  The flower is made from Tempting Turquoise card stock that has been punched, then folder in a fan fashion around a small punched circle tht is covered in sticky tape.  This particular flower is done using two strips of paper, but you can use how many you want, depending on how big you want your flower to be!  Once the flower was put together, we sprayed it with Vanilla Smooch, and then added a designer brad to the center.  The main image is from the Eastern Blooms stamp set, and the image was colored using Stampin' Write markers, then spritzed with So Saffron.  As I said, lots going on here, but the card came out great and the gals loved making it!!! Now, I am busy making my Convention Swaps, and getting my class projects together for my new stamp month! If anyone is interested in taking a class or hosting a workhop, please look at my website to see what I have on the schedule and email me if you want to reserve your spot or book a workshop date! Have a wonderful day and Happy Stampin'!!!
Card One Recipe:
Paper - Bermuda Bay, So Saffron, Whisper White,Vellum card stock, Bermuda Bay patterns pack
Inks- Bermuda Bay and So Saffron stampin' write markers
Stamps - Teeny Tiny Wishes, Fifth Avenue Floral
Accessories - Silver Brads, Versamark, White embossing powder, heat gun, small and large oval punches, organza ribbon
Card Two Recipe:
Paper - Crumb Cake, So Saffron, Tempting Turquoise, Certainly Celery, Whisper White card stock, Flock Together designer series paper
Inks - Old Olive, Tempting Turquoise, So Saffron stampin' write markers, Tempting Turquoise classic ink pad
Stamps - Eastern Blooms, True Friend
Accessories - Eyelet Border Punch, Scalloped Edge border punch, Square Lattice embossing folder, Scallop Oval punch, So Saffron wide grosgrain ribbon, Tempting Turquoise brads, Square Scallop Bigz Die, Spritzer tool, Designer brad, Vanilla Smooch spray

June 28, 2010

STAMPIN' CONNECTION SKETCH CHALLENGE - SAYING GOODBYE

Happy happy Monday all!! I hope you all had a wonderful weekend! Mine was very full but it was great!! Taught class, saw my Club Gals (love them, they always make me smile!) and then went outdoor furniture shopping with Tony!  We found everything we were looking for, but had to travel far and wide to find it, lol! We are both glad it is DONE!!!! So, today I am off to the waterpark with the kids and some friends, but first I want to share with you the two cards I did for today's sketch challenge over at Stampin Connection!  The sketch was posted by my fellow Design Team member Carole' Ann - it is a rockin' sketch so if you are a demo, you really need to get on over there, check it out, and show us what you can do with it! My husband has two employees that are sadlly being let go due to budget cuts (I hate this dang economy!) so he asked me to make cards for them.  I wanted to keep it light so these are the ones I came up with! The first one is for a guy so I decided to use my motorcycle stamp and my Nouveau Chic designer series paper (so sad to see this one go!) since I think it works sooo well for male cards.  I kept the colors simple, and used my spritzer tool to add some texture to the image and I am quite pleased with how this one came out - I hope he likes it too! 
This second one is made using my Flamingo series paper, oh, how I love this paper!! It was one of my faves from this catty, and I will miss it! The stamps are the Ever After Stamp Set, which is also a fave of mine and thankfully will still be available in the new catty! I can't lose ALL my faves *wink*  I added many more girly touches to this card since it is for a woman that has also been with the County for awhile whose position also went away :-(  She is a nice lady, and I really hope something even better comes along for her soon!  I wanted to keep the card bright and cheery so I did throw in some Summer Sun as an accent color and I like how it looks with the Cameo Coral. The sentiment is actually on the inside of this card with a private message and room for everyone to sign.  I know it won't make it easier on them, but I am hoping these cards will at least brighten their day just a little bit! Now, I am off to finish packing the cooler and getting the kids all loaded up to meet our friends and off we go!! I will be back later in the evening to do some blurfing -can't miss out on what you all are doing, lol!! Have a wonderful day and thanks so much for stopping by :-)
Card One Recipe:
Paper - Basic Gray, Mellow Moss, Whisper White card stock, Nouveau Chic Designer Series paper
Inks - Black Stazon, Mellow Moss classic ink pad, Basic Black and Going Gray stampin' write markers
Stamps - Motorcycle, Smarty Pants
Accessories - Wide Oval Punch, Scalloped Edge Border Punch, 3/4 inch and 1/2 inch circle punches, Going Gray taffeta ribbon, silver jumbo brads, Mat pack and paper piercer, Spritzer tool
Card Two Recipe:
Paper - Cameo Coral, Summer Sun, Whisper White card stock, Flamingo Designer Series paper
Inks - Cameo Coral classic stamp pad, Summer Sun, Gable Green Stampin' write markers
Stamps - Ever After
Accessories - Pinking Hearts Border Punch, Eyelet Border punch, Jumbo eyelets, Crop-A-Dile, Whisper White and Maize(retired) narrow grosgrain ribbon, Whisper White wide satin ribbon, Boho Blossoms punch, 1/4 inch circle punch

June 25, 2010

A DIFFERENT TYPE OF STAMPING - BUT WAY COOL!


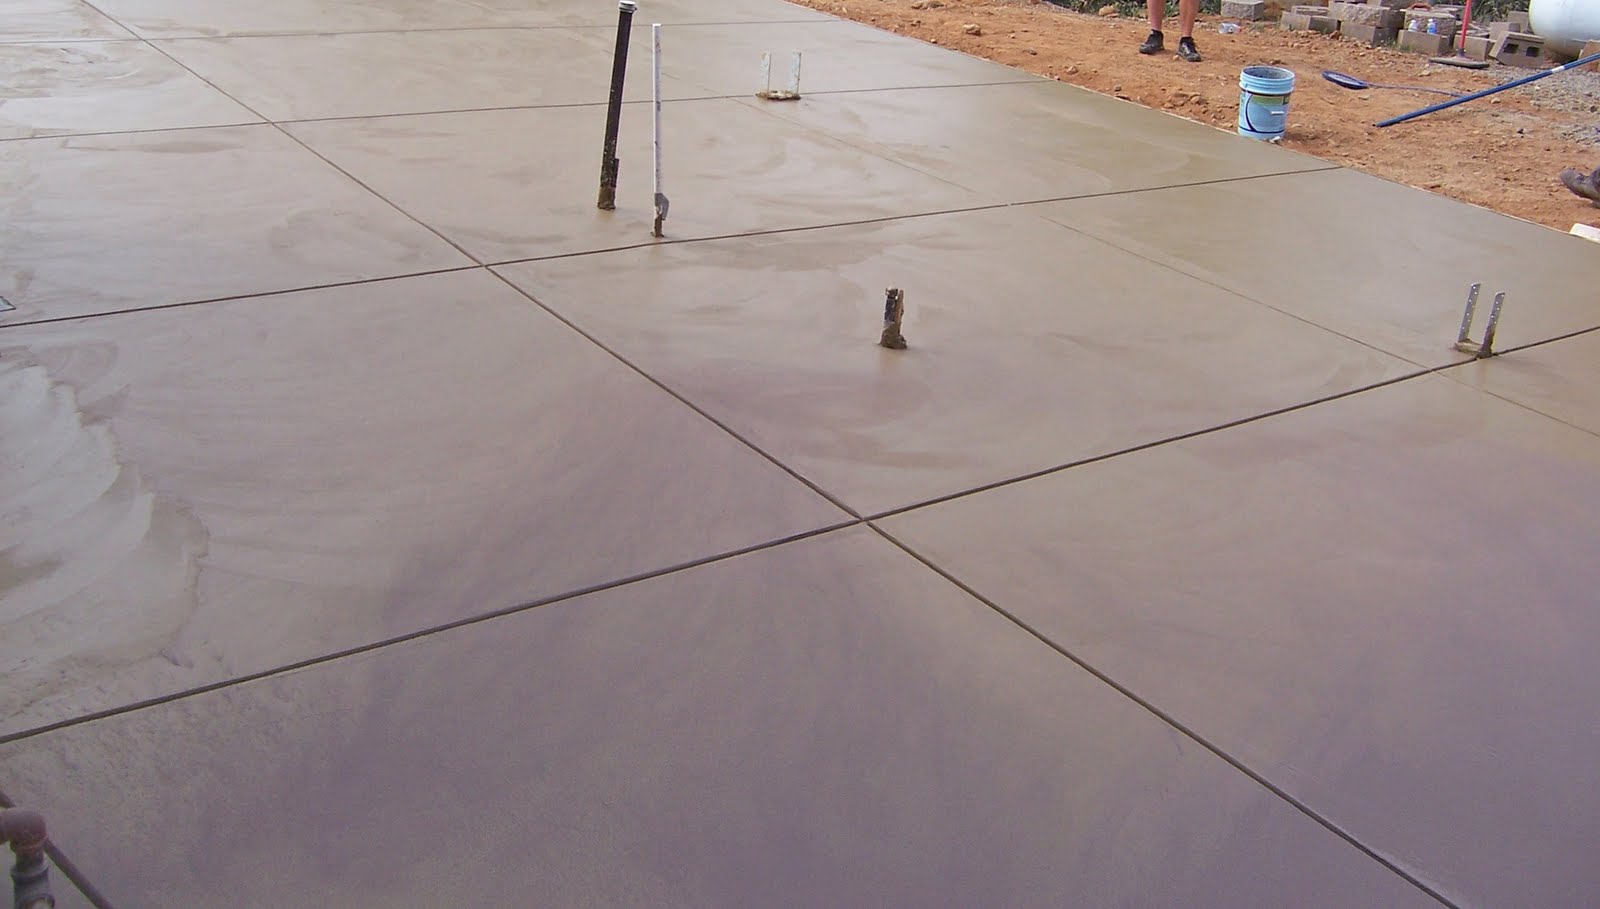
Hi all!! I have been merrily stamping away but I can't share anything yet since the classes are today and tomorrow and I like it to be a surprise for my customers :-) BUT, I do have some really fun stamping pictures to show you - a little bit different than what we normally do, but pretty cool!!! We are having our patio put in and we decided we wanted stamped concrete so I thought I would share some of the pics!  This first one is the fresh concrete after it has been smoothed and the lines put in - amazing to watch! They have these cool little knee skates that they skate all over with and they were having fun....I wanted some for me, lol!! 
 The next one show them putting down the stamping powder - kind of like embossing powder since it is what makes the image of the stamps visible. Although they use a lot more and it is a HUGE mess of powder!!  And, it does not come in cute little jars but huge 5 gallon drums, heehee!!!  I had to shut the door quickly because there were huge clouds of powder dust in the air and I did not want them coating my entire house - I just got it all clean *wink*
So, this third pic shows them laying down the giant stamps that create the textured impressions in the wet concrete - I am amazed at how big these stamps are and how each one is different but they all somehow work together to make one beautiful patio!  And, then they use this huge stamping tool to add pressure to the actual stamp plates and get a nice crisp "image" in the concrete. I have GOT to get me one of these, LOL!!!!
This last picture gives you an idea of the stamped images left behind - it really is cool to see IRL.  It is not dry and they still need to "cure" and stain it, but I just thought this was so stinkin' cool that I just had to share.  I hope you all have a fabulous weekend - I will be back with some fun stamping projects tomorrow so until then - HAPPY STAMPING!!!!

June 24, 2010

FRIENDS NEVER FADE....PREVIEW ALERT!!

Hi all!!! Oooh, I have a fun card to share with you today - it features some of the new sneaky peek items from the new catty - YUMMY! I made this card for the sketch challenge this week over at Stampin' Connection! My fabulous fellow DT gal Liz is the sketch artist this week and it is FABULOUS!!! So, if you are a demo, get on over there and check it out!!!  So, now back to the card, LOL!!! Lots of fun new products on this one! I used a new stamp set called Friends Never Fade and I LOVE LOVE LOVE it!! Lots of great images in this set and I adore the sentiment! And, doesn't it pair up nicely with the yummy new patterned paper called Greenhouse Gala??!! Ummm....yeah :-)  But, that's not all folks - check out the embossing on the Old Olive card stock......yep, that is a brand spankin' new embossing folder called Vintage Wallpaper!  I love how it looks and think it will be a definite favorite for sure, heehee!! I also sparkled it up by spraying some Vanilla Smooch on there but it is hard to see here.  I made this card for a friend of mine that is very dear to me and has been wonderful to lean on the last few weeks so I wanted lots of pretty details.  I added some stitching around the main images - I just love stitching on my cards! And, I used the scallop border punch on the patterned paper and then added several silver brads to accent the card. Finally, no card is complete without some ribbon so I got out my chocolate chip wide satin ribbon and just love how warm it makes this card!! I really hope she likes it - she is not a computer gal so I am okay with posting this, lol!! She should get it tomorrow in the mail and I really hope it makes her smile! So, there you have it - lots of fun new previews from the new catty that goes live on July 1st! And, don't forget:  you still have time to order some of your favorites from the current catty before they all go byebye on the 30th of this month!! If you need to place an order, you can shop online at my store here or send me an email!  And, if you need a new catty, email me so that I can get one out to you!! Now, off to prep for my class later on and to do some stamping! Thanks so much for stopping by, I love when you do!! Pop in tomorrow - I have something really fun to share!!! Bye for now!!
Card Recipe:
Paper - Chocolate Chip, Old Olive, Baja Breeze card stock, Greenhouse Gala Designer Series paper
Inks - Chocolate Chip and Old Olive classic inks
Stamps - Friends Never Fade
Accessories - Vintage brads, Mat Pack and paper piercer, Chocolate Chip stampikn' write marker, playground button, twine, Chocolate Chip wide satin ribbon, Vintage Wallpaper embossing folder, Vanilla Smooch Spritz, Circles 2 Big Shot Die

June 23, 2010

SCRAPBOOK WALL ART

Good morning all!!! Sorry, I meant to share this with you yesterday but I was feeling pretty bad as it seems I have yet another sinus infection...uggghh.......I think living in CA is going to kill me, LOL!!!!  But, better late than never, right??  This is the canvas that we made in my canvas class last week - I have to say, this is one of my most popular classes and one of my favorite to teach!! I just love that when we are done, everyone has something they can hang up on their wall and enjoy!  I have several of these on my walls in my home and I still smile when I walk by them and often stop and look at them all over again since they always remind me of fun family moments!  Each person gets to pick their own colors from several neutral ones that I have availalble so although the layout is the same, they all turn out looking quite different!  For my class sample, I chose to use pics of Tyler from our houseboat vacation last summer - something about these pictures really gets to me.  I just love them!! We also used To the Nines designer series paper as it has wonderful base colors to choose from.  The letters are from the alphabet stamp set called Lovely Letters and they really are! And, we stamped them on tags we punched out using both the large and small tag punches - love them!  We also used the stamp set called a Sense of Time; the clock was stamped in Versamark then embossed with gold embossing powder and cut out.
 Here is a closer view so you can see how pretty the embossing looks - it has such a great shine to it and the details of the stamp really stand out!  And, we added some of the cogs from our new cogs punch which can be found in the Summer Mini; such a fun punch!  The chocolate chip wide satin ribbon is soooo yummy and looks really good with these colors and then we accented them with some Old Olive Taffetta ribbon as well. This is where the sentiment is also attached.
The sentiment was actually handwritten on some card stock that was punched out using the designer label punch and mounted using one of the pretty pieces from the Very Vanilla Hodgepodge Hardware - here is a closeup so you can see it a little better!  This is a super fun project and is a WOW everytime!  I am actually teaching this class again this Friday night so if anyone from the local area is interested, I do have three seats still available and would love to have you join us!! Just contact me via email or phone and I will get you all set up!  So, now I am off to run some errands, have lunch with a friend, and then back home to prep for Club and classes later on this week! I hope you all have a fabulous day and thanks soooo much for stopping by, I love that you do!