June 2, 2010

MOTORCYCLE MADNESS

Hi all!!! Well, I think I have recovered from my weekend event, LOL!  Actually, I have kind of taken it easy the last few days, not much stamping, just catching up on everything that didn't get done while I was prepping last week! I wanted to share one of the projects we did on Saturday using the Faux Metal technique and this really cool motorcyle single stamp from the Summer Mini! Never thought I would buy a stamp like this, but I LOVE it, and have been stamping away madly with it over the last week (hence the title, heehee!)  I used the new travel journal designer series paper as well - just love it! And, of course, my handy Top Note Die which I just adore and use all the time *wink* was perfect for doing my faux metal background! I cut it out using Sahara Sand card stock because the silver embossing powder works better on the lighter colored card stock.  I also embossed it using the Finial Press embossing folder and I love the cool look!!! My image is also embossed using verasmark and black powder - makes the bike look nice and shiny! And, I spritzed some Night of Navy over the image because I love the effect it has! I am quite happy with this card and the gals all loved it when we made it on Saturday!  I did leave the sentiment off so they could decide what they wanted to use the card for - I think it would be a great Father's Day card!  Today I am making projects for my upcoming workshop this weekend and working on some class projects so no more slacking for me - back to work, lol!! Love my work though....so, off to stamp! Thanks so much for stopping by, I really appreciate all your comments!
Card Recipe:
Paper -Night of Navy, Sahara Sand, Pumpkin Pie, Naturals White card stock, Travel Journal Designer Series Paper
Inks - Versamark, Night of Navy stampin' write marker
Stamps - Motorcyle (summer mini single stamp)
Accessories - Bigz Top Note Die, Pumpkin Pie wide striped ribbon, Night of Navy narrow grosgrain ribbon, Black and Silver embossing powders, heat gun, Finial Press embossing folder

June 1, 2010

$99 MINI STARTER KIT PROMOTION.....AND THE LAST CHANCE LIST IS OUT!

Hello all!! WOW!! NOW is a great time to become a demonstrator! If you have been thinking about it, but have not done so, NOW IS THE TIME!!! Whether you just love to craft, or you want to grow a successful, thriving business, Stampin' Up! is a great opportunity for you. I would certainly love for you to join my team of fabulous demonstrators!  And from June 1-30, 2010, you can start your own Stampin' Up! business for just $99 with the special Mini Starter Kit!!!!!  The Mini Starter Kit--valued at over $180--contains the items listed below; while all items are recommended, you can substitute a like item of equal or lesser value.   And, NONE OF THESE ITEMS ARE RETIRING!!!

•Watercolor Trio stamp set (wood-mount)
•I {Heart} Hearts stamp set (clear-mount)
•Clear-Mount Block C
•Homemade single stamp*
•Whisper White card stock (8-1/2" x 11")
•Brights Collection assorted card stock (8-1/2" x 11")*
•Melon Mambo Classic Stampin' Pad
•Daffodil Delight Classic Stampin' Pad*
•Rich Razzleberry Classic Stampin' Pad
•Tempting Turquoise Classic Stampin' Pad
•Basic Black 1/8" taffeta ribbon*
•Color Coach*
•SNAIL Adhesive
 
*Sneak peek items
 
The Mini Starter Kit also includes the same business supplies that are in the standard Starter Kit (please note: no alternative selections can be made for business items). Contents are listed below:

•Getting Started DVD
•Getting Started Guide
•Guest Invitation Postcards (100)
•2009-2010 Idea Book & Catalog (8)
•Summer Mini Catalog (8)
•To My Hostess Envelopes (10)
•Recruit Folders (5)
•Recruit Brochures (20)
•Hostess Brochures (20)
 
AND, new demonstrators who join Stampin' Up! in June, you will receive a free box of 2010-2011 Idea Book and Catalogs during the first part of July.

Want to know more? Contact me now with any questions you may have. You can also check out the Why Become a Demonstator page that addresses many of the Frequently Asked Questions. And, if you are ready to join now, you can go to my website and join online - you will need my password which is iluv2stamp!

******LAST CHANCE LIST IS OUT******

 I love this time of year - the much anticipated new catalog is right around the corner and we all know that means fabulous new products!!! But, it also means we have to say good bye to some of our favorites.... and  June 1st marks the day to view the lists of STAMP SETS, the ACCESSORIES, and the DEFINITELY DECORATIVE ITEMS THAT ARE RETIRING.  So, if you to my Demonstrator Website, you can view the list of RETIRING ACCESSORIES - these items are limited in quantity and ITEMS WILL SELL OUT QUICKLY....so make sure you don't wait to place your order or YOU WILL MISS OUT!!!


Click here to download a copy of the Last Chance list and check out the following links below for more retiring information!

Check out the  list of  25% off retiring items
Check out the list of  50% off retiring items  
Check out all retiring stamp sets
Check out all retiring accessories
Check out all retiring home decor items
Check out all retiring Sizzix Items
Check out all retiring punches
Check out all retiring ribbons
Chek out all retiring wheels

WHEW!! There you have it - the lastest and greatest on the transition from the current catalog to the new one.....sooooo, what are waiting for??? Click here and shop with me now and get them before they are gone!!

May 31, 2010

PURSE CARD BOX

 I really did not mean to be gone for this long - I can't believe I actually missed a whole week!! But, I was crazy busy with getting ready for the Annual Scrap and Stamp Fest that happened this past Saturday and I am very proud and pleased to say that it went off without a hitch and everyone had a great time!!! I have pics to share with you a little later this week, but today I wanted to share one of the projects from the event.  It is a purse card box which will hold up to six A2 cards depending on your embellishments -this particular one I did four cards with envies and had plenty of room!  I used a lot of fun things to make this box and added lots of texture with my embossing folders! The front of the box you can see the Lattice Square embossing on the Tempting Turquoise center strip - LOVE the way this looks!! And, I just had to add some scallops as well, I just love how they look!
 Here is a picture of the actual cards that fit inside this fun box!  I wanted you to be able to see them all, so I realize there is not a real closeup, but you get the idea *wink*  These cards were so fun and easy to make using the Hostess Level II set called Punched Posies - I just love how each and every stamp in that set has a corresponding punch to match! Sure makes cutting them out a snap and they all look sooooo good together!  And, I used the yummy Island Oasis designer paper from the Summer Mini as well - I just love the bright colors and the summery feel they have! This was a fun kit to put together and the ladies loved it!! I will be sharing more projects over the next few days, so make sure you stop by and check them out!! Now, I am off to work on some projects for ME - don't get to do that too often, lol!!!! Thanks soooo much for stopping by, I love ya for it!
Card and box recipe:
Paper - Old Olive, Pumpkin Pie, Tempting Turquoise, Summer Sun card stock, Island Oasis Designer Series Paper
Inks - Old Olive, Pumpkin Pie, Tempting Turquoise, Summer sun classic inks
Stamps - Punched Posies
Accessories - Square Lattice embbossing folder, Summer Sun, Tempting Turquoise, Pumpkin Pie narrow grosgrain ribbon, Old Olive wide satin ribbon, twine, Pumpkin Pie Corduroy button, Scalloped edge border punch, Flower burst embosslit, butterfly embosslit, Butterfly Punch, Circle Scallop Punch, 1 inch circle punch, 1/2 inch circle punch, Extra large Fancy Flower punch, Five-Petal punch

May 24, 2010

STAMPIN' CONNECTION SKETCH CHALLENGE - TIMELESS LOVE

Happy Monday all!!! WOW!! VERY busy weekend, but fun!! I had a class Thursday and Friday, my anniversary was Saturday, and I had a workshop on Sunday, LOL!! Lots of stamping with friends, both new and old - and I got to spend a wonderful night with my husband on Saturday night to celebrate our 17th wedding anniversary!!! Actually, the card I am sharing today is based on the sketch card challenge posted today at Stampin' Connection - it is my week to make the sketch so I will also share it here if you want to play along :-)  I gave this card to my husband for our anniversary, and he told me he was sure it was the best one I have ever made....he knows just what to say, lol!  I am glad he liked it though! I used the set called Sense of Time - I find it very fitting when talking about a lifetime of memories shared between two people in love!  We aren't quite at a lifetime but hey, we DO plan on making it there *wink*  I also did this card is grays and blacks because I like the elegant feel these colors have together.  The background patterned paper is from the Nouveau Chic collection, one of my ultimate faves!  I also did lots of embossing and smooching on this card (appropriate for an anniversary card, heehee!) although it is a little hard to see in the pic.  I stamped little hearts from the Sprinkles background stamp set and used my pinking hearts border punch (carried over from the Occasions Mini and still available to order) as well.  The sentiment is from the Summer Mini stamp set called In a Word - I just love it!  It is stamped in going gray and punched out using the Modern Label punch.   I love how it turned out, it was exactly what I wanted for my honey!!
Here is the sketch this card is based on (yeah, I know, I changed up my own sketch, lol) and if you are a demo, please upload your take on this card to the gallery at SC with the keyword SCCSC18 - I want to see them!! And, if you are not a demo, but still want to play along (I hope you do!) leave a link for me so I can stop by and see what you did!
And, I thought I would share a couple of pics from our fun night out - we went to a Mystery dinner with some friends of ours and we had a great time! We all had parts to play since I know all the fun ladies at the Monday Club and they wanted us to be major players! Tony was gambling Jack and I was Annabelle, the rich Southern Belle he married for her money, LOL!! We had fun dressing up in costume and laughed all night as we played our roles!! We went with two other couples and just had a wonderful time!!
Here are a few of the pics from the evening!  Here we are all dressd up and out in the front of the house before we left - I had to laugh, I told Tony he looked more like Garth Brooks than a Wild West gambler :-)  And, here is another pic of the two of us together because I wanted a chance to try out my parasol!!! Really fun, I had such a great time, it was like grown-up dressup day, heehee!! 
And, here are a few of us by ourselves - I have to say, I think my husband looks very handsome (I might be biased, but hey, I am sticking to my story, lol!)  Too fun, so glad we went!  And, if you are still with me, you deserve big hugs and a smooch - thanks for stopping by to see me today!!! I will leave you with the recipe - now I am off to start prepping in a big way for my First Annual Scrap and Stamp Fest right here in Oroville next Saturday!  It will run all day from 10am to 8pm with all kinds of fun projects, good food, fun goody bags - what could be better?!! So, off to prep - be back tomorrow!!
Card Recipe:
Paper - Going Gray, Basic Gray, Black, Naturals White card stock, Nouveau Chic Designer Series Paper
Inks - Going Gray, Basic Gray, Basic Black, Versamark
Stamps - Sense of Time, Sprinkles, In a Word
Accessories - Black embossing powder, Pinking Hearts Punch, Square Lattice and Swiss Dots embossing folders, Vannilla Smooch, Modern Label Punch, Silver Brads, dimensionals

May 20, 2010

A LITTLE BARBECUE ANYONE?

HAH!! Good morning all! This new stamp set from the Summer Mini cracks me up! It's called King of the Grill and is just such a fun image!!  This card I am sharing today is based on this week's sketch challenge at Stampin' Connection where my fellow team member Liz knocked our socks off with a fab sketch! If you are a demonstratror, get on over there and check it out and let's see what you can do with it!  I thought this might make a great Father's Day card, but well, I have not really decided yet, LOL! So, I left off the ribbon although it about killed me to do so, heehee!! I used the Nouveau Chic Designer Series Paper, and my new Square Lattice embossing folder - love how it looks and it actually changes the texture of the card stock!  And, although it may be hard for you to tell, I used my Frost White Shimmerz paint on both the embossed card stock and the main image (click image for closer look).  Fun card to make and I am happy with how it turned out!  So, quick post today, I am getting ready for my Canvas class tonight and have a million things to do before the ladies arrive!  Thanks for stopping by, your comments ROCK!
Card Recipe:
Paper - Ruby Red, Basic Gray, Whisper White, Sage Shadow card stock, Nouveau Chic Designer Series Paper
Inks - Black Stazon, Ruby Red, Sage Shadow, Basic Gray, Going Gray, Blush Blossom Stampin' Write markers
Stamps - King of the Grill
Accessories - Sage Shadow buttons, Modern Label Punch, Ticket Corner Punch, Scallop Border punch, Circle Die for Big Shot, twine, sponge, Shimmerz mixed with alcohol

May 19, 2010

WATERCOLOR TRIO SUMMER MINI SWAP

Happy Hump Day!! I have been stamping away getting ready for two workshops this weekend, my canvas class on Thursday and my downline meeting, which was last night!!! So much fun, but not a lot of blog time, LOL!  We had a great time at our meeting last night! I had asked all the gals to make a card that featured products from the Summer Mini for a Shoebox Swap and I was blown away by the talent!! I have a couple more gals that could not make it last night, but  are sending their cards so once I have them all, I will put a slideshow up so you can see how beautiful their cards are!! I thought I would share the card I made for the swap featuring the Watercolor Trio Set and the All A Flutter single butterfly stamp - ooh, I just love this stamp, such a pretty butterfly! I also used my Frost White Shimmerz on the Chocolate Chip Scalloped Square (cut it on my Big Shot) and the butterfly and I just love the sparkle!  I stamped on Naturals White and distressed the edges with my distressing tool, then sponged the edges using Sage Shadow, which I will greatly miss since it is being retired *sniff* - I just love how soft and pretty this color is!  I stamped the leaves in the same color, then added some flowers stamped in Soft Suede . The designer series paper is from the set called To the Nines and I love how thick and textured this paper is!! I added some Very Vanilla ribbon, stamped and sponged my sentiment with Soft Suede after punching it out using the Scalloped Oval Punch. The butterfly is stamped in Soft Suede as well, then colored in with my Stampin' Write markers, and spritzed with the Frost White Shimmerz - soooooo pretty and sparkly!! I am happy with how this card turned out and the girls loved it, which brought a smile to my face!!! It was fun to see all the different styles we have for stamping - so many gorgeous but totally different cards.  So, now I am off to finish prepping for my class tomorrow but first I am going to go and check out some of my fave blogs - yep, YOURS, LOL!!!! Thanks so much for stopping by, your comments are fabulous and I read them all!! I will be back tomorrow to share another card I made for the meeting last night - it is a fun one, so make sure you check back!!! Toodles!!
Card Recipe:
Paper - Kraft, Chocolate Chip, Naturals White card stock, To the Nines Specialty Designer Series Paper
Inks - Sage Shadow, Chocolate Chip, Soft Suede classic inks and Stampin' Write markers
Stamps - All a Flutter, Watercolor Trio
Accessories - Small Circle hole punch (for scallops), Very Vanilla narrow grosgrain ribbon, distressing tool, sponge, Frost White Shimmerz spray(alcohol mix)

May 17, 2010

MY BOY


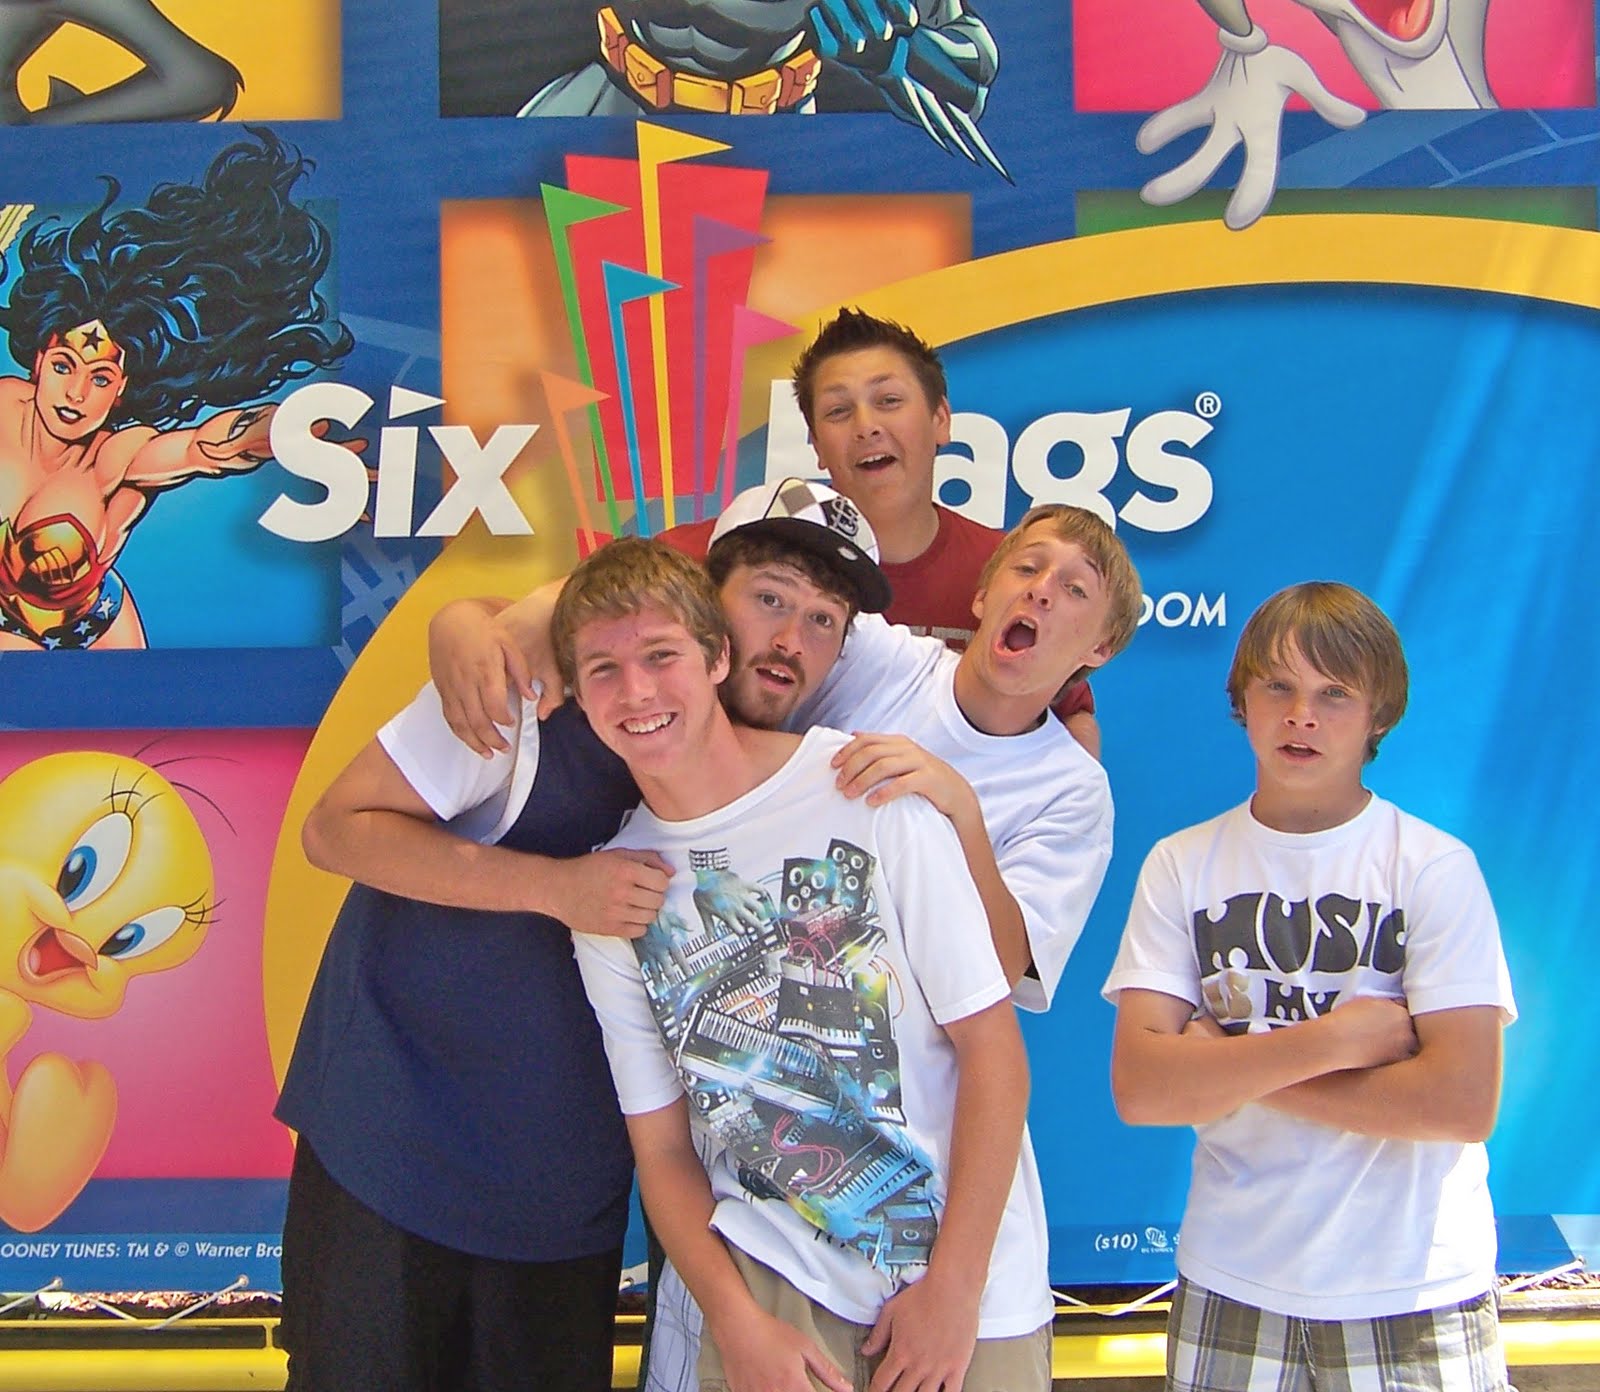
Hey all!!! I hope you all had a wonderful weekend - I tell ya, it flew by! Yesterday was my son's 16th birthday - I can't believe it!!! So, we had a whole weekend of birthday festitivites! On Friday night all his buddies spent the night so that they could leave early Saturday for a day at Six Flags!! They had a wonderful time, but they came home exhausted, lol!! Tony went with them as I had Club that day and well, I don't ride anything anyway so it was a nice day for the boys.  Yesterday we did family things together - I baked him a double decker chocolate cake, and we took him to dinner at Olive Garden (his choice).  Then, we came home and he opened his family gifts which he loved and then we watched movies.  It was a nice day with just us although I wish my oldest son could have been home!!! I think he had a really nice birthday - he seemed pretty happy anyway, lol!!! So, I wanted to share the card I made for Tyler - he is an avid snowboarder so I made him a card with the Extreme Snowboarding stamp, which I think is cool because it is a shadow stamp! I also used the Extreme Elements stamp set - I just think they go together really well!  I used lots of different inks on this card, and I like how the combination turned out!  I popped the snowboarder up on dimensionals after I versamarked it, then covered it in clear powder and heat set it to give it a nice shine!  Since this card was going to my son, I did the inside as well! 
Here is a picture of what it looks like: I used the same stamps sets and sponged the edges of the naturals white card stock with Soft Suede, then stamped off the snowboarder image so that it looked like he was in motion! Tyler loved this card, he thought is was cool that he had a personalized card for snowboarding....score points for mom *wink*  He actually took the card into his room and put it up on his bulletin board, so that is pretty high praise and hey, I will take it, LOL!  It was a fun card to make and I love that my kids really appreciate that I make them for them - they are full of love so I think that makes them special, don't you So, that is my card to share today! I thought before I left ya and went to prep kits for class, I would share some of the fun pictures we took of Tyler during all his birthday festivities- he is such a ham sometimes and he loves to joke and play around and I think we caught some of that in these pictures. 
This first picture is of the boys at Six Flags - I have to say, I really like the friends Tyler hangs around with, they all play sports, we know all their parents, and they were raised with the same values my son was so it is nice to have them all around! And, as you can see in the pictures, they all share a sense of humor! This second picture is of the same group but still goofing around - I think they enjoyed hamming it up for the camera since they knew Tony had strict instructions to come home with pictures of them from the park, LOL!

Just look at that group mugging for the camera! I have to say, these pictures totallly made me giggle when Tony showed them to me - it is soooo obvious that they are having a good time and that they are friends who enjoy being around each other!! Nothing better than spending good times with friends that you can count on!!!  These last couple of pics are of Tyler playing around while I took pictures of him opening his gifts from us.  I usually wrap them all separately and then put them in a really big birthday bag - I have been doing it for years, and the kids seems to get a really big kick out of the "bottomless bag".  Tony thinks I spoil them and I do - but hey, they ARE mine to spoil, and they grow up and go out on their own, so for the short time they are in my home, I am going to ensure that they have fond memories to look back upon when they have kids of their own!!! So, here he is, my big ham!

I hope I did not bore you too much but I wanted to share some fun pictures of a milestone in his and MY life - sixteen, I still can't believe it!! So, if you stuck with me through this whole post, BIG HUGS AND SMOOCHES to you!!!!!  Now, I will leave you with the recipe for the card and off I go to my stamp room to finish up things for my downline meeting tomorrow and to cut some kits for classes later on in the week! Thanks so much for stopping by, I love ya for it!
Card Recipe:
Paper - Not Quite Navy, Chocolate Chip, Naturals White, To the Nines Specialty Designer Series paper
Inks - Not Quite Navy, Chocolate Chip, Soft Suede, Creamy Caramel stampin' inks
Stamps - Extreme Snowboard, Extreme Elements, Voila (sentiment)
Accessories - Scallop Circle Bigz Die, Clear Circle Bigz Die, Ticket Corner Punch, Curly Label Punch